
Bulk Invite & Bulk Operations
When your unit grows, doing things one member at a time gets slow. MySummitKeep gives you two tools for working in bulk: the Bulk Invite wizard for inviting a whole list of people from a spreadsheet, and Bulk Operations for acting on many existing members at once — assigning a patrol, sending a message, exporting a CSV, updating rank or role, or archiving people who have aged out.
Both tools live under Members. You will need leader-level access: Bulk Invite requires permission to create members, and Bulk Operations requires permission to update them.
Bulk Invite: the 5-step CSV wizard
Section titled “Bulk Invite: the 5-step CSV wizard”Open Members → Bulk Invite Members. The wizard walks you through five steps shown along the top: Upload, Map Columns, Validate, Preview & Send, and Results. You can go back to any earlier step until you actually send, so it is safe to experiment.
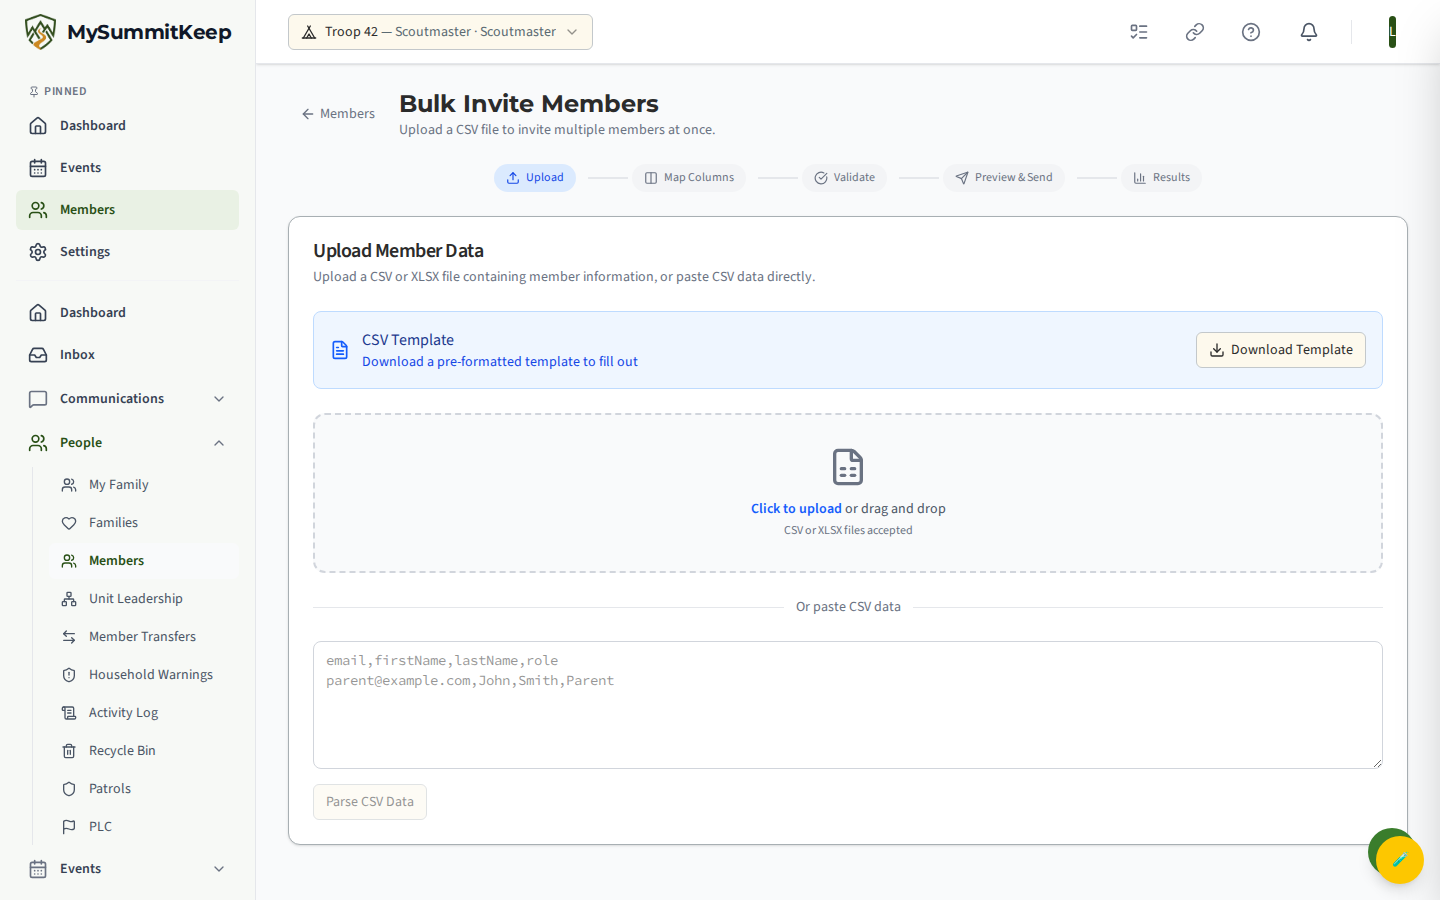
On the Upload step you can drag and drop a file, click to browse (CSV or XLSX accepted), or paste CSV text directly into the box below the dropzone.
Preparing your CSV and the template
Section titled “Preparing your CSV and the template”The simplest way to get the format right is to click Download Template on the Upload step. It gives you a bulk_invite_template.csv with these columns:
- email — required. Each person needs a valid, unique email address.
- firstName — optional but recommended.
- lastName — optional but recommended.
- role — optional. Use
Parent,Leader,Scout,Admin, orAssistant. Friendly variations are accepted and normalized (for exampleGuardianbecomesParent, andScoutmasterbecomesLeader). If you leave it blank, the row defaults toParent. - phone — optional.
Mapping columns and validating rows
Section titled “Mapping columns and validating rows”After your file loads, the wizard moves to Map Columns. It auto-detects column headers and matches them to the invitation fields; you adjust any that are wrong using the dropdowns. The header shows your file name and row count for a quick sanity check.
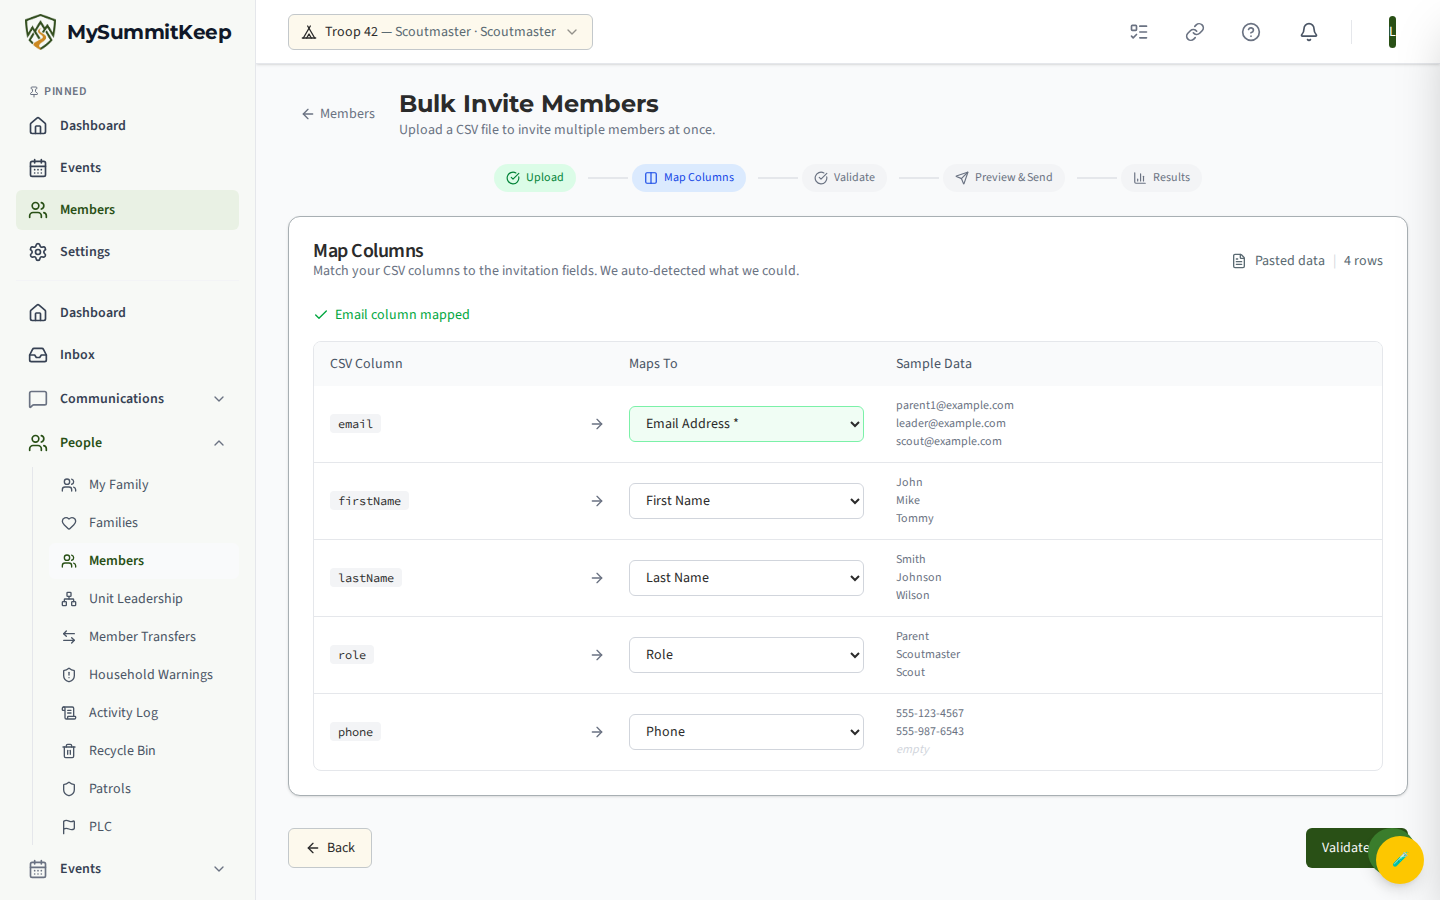
You must map at least the Email column — the wizard will not advance without it. Click Validate to check every row. The Validate step flags problems so you can fix them before anyone is contacted:
- Errors (red): missing email, invalid email format, or a duplicate email inside your file. These rows are blocked from sending.
- Warnings (amber): a phone number that looks malformed, or a role that was normalized to a standard value. Warnings do not block sending.
You can change a row’s role inline or remove a row entirely right from the validation table.
Previewing and sending invitations
Section titled “Previewing and sending invitations”The Preview & Send step shows the final list of invitations that will go out — error rows are automatically excluded, so you only see what will actually be sent.
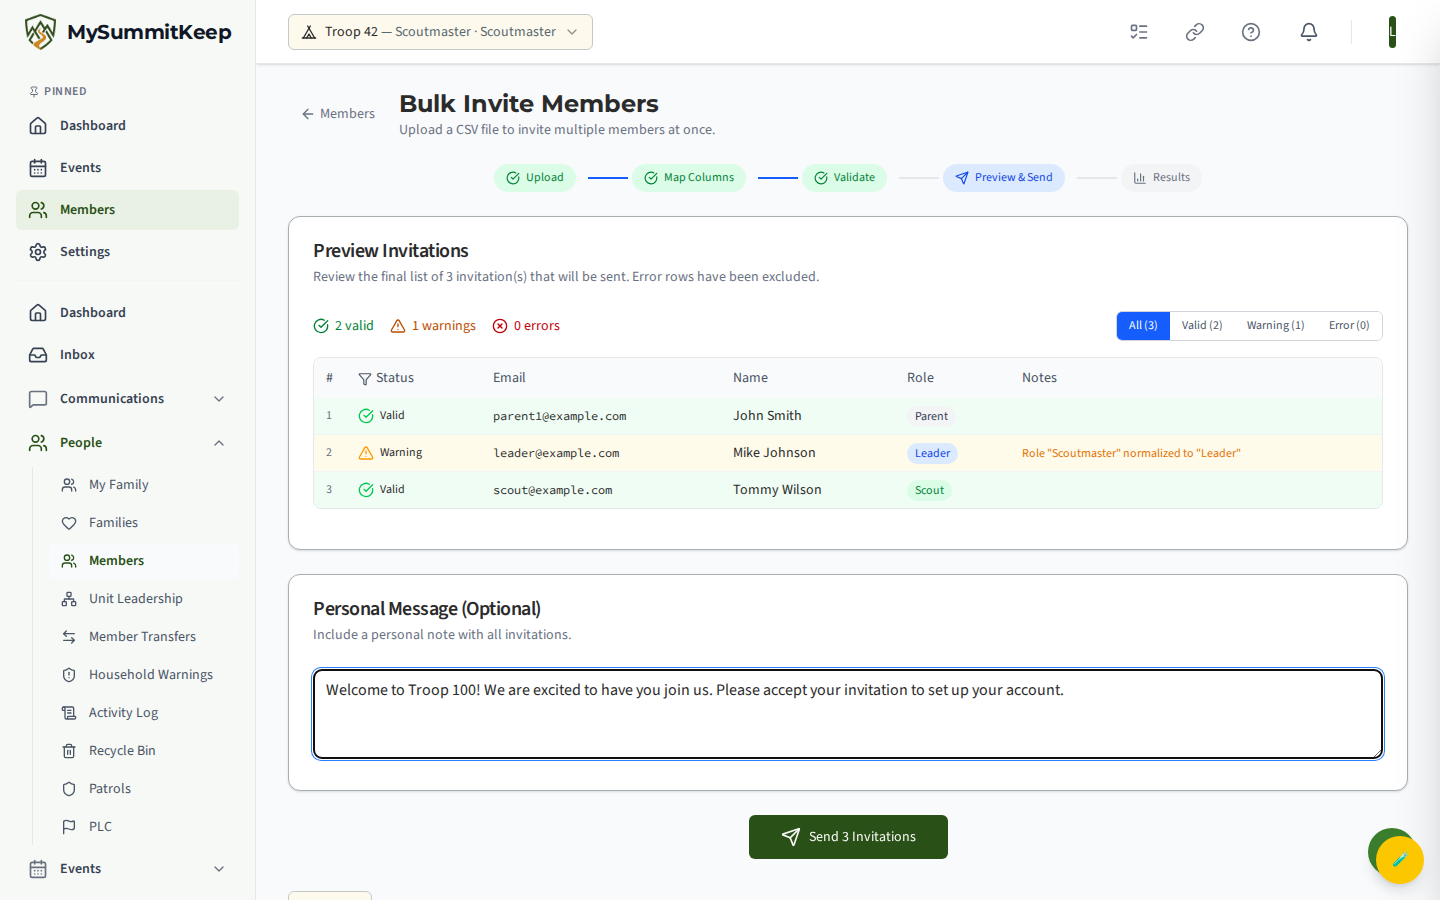
You can add an optional Personal Message that is included with every invitation, then click Send to send them all. Invitations are set to expire 30 days after sending.
Reading the results
Section titled “Reading the results”The Results step gives you three summary tiles — Sent Successfully, Skipped, and Failed — followed by a per-row table showing the outcome for each email address.
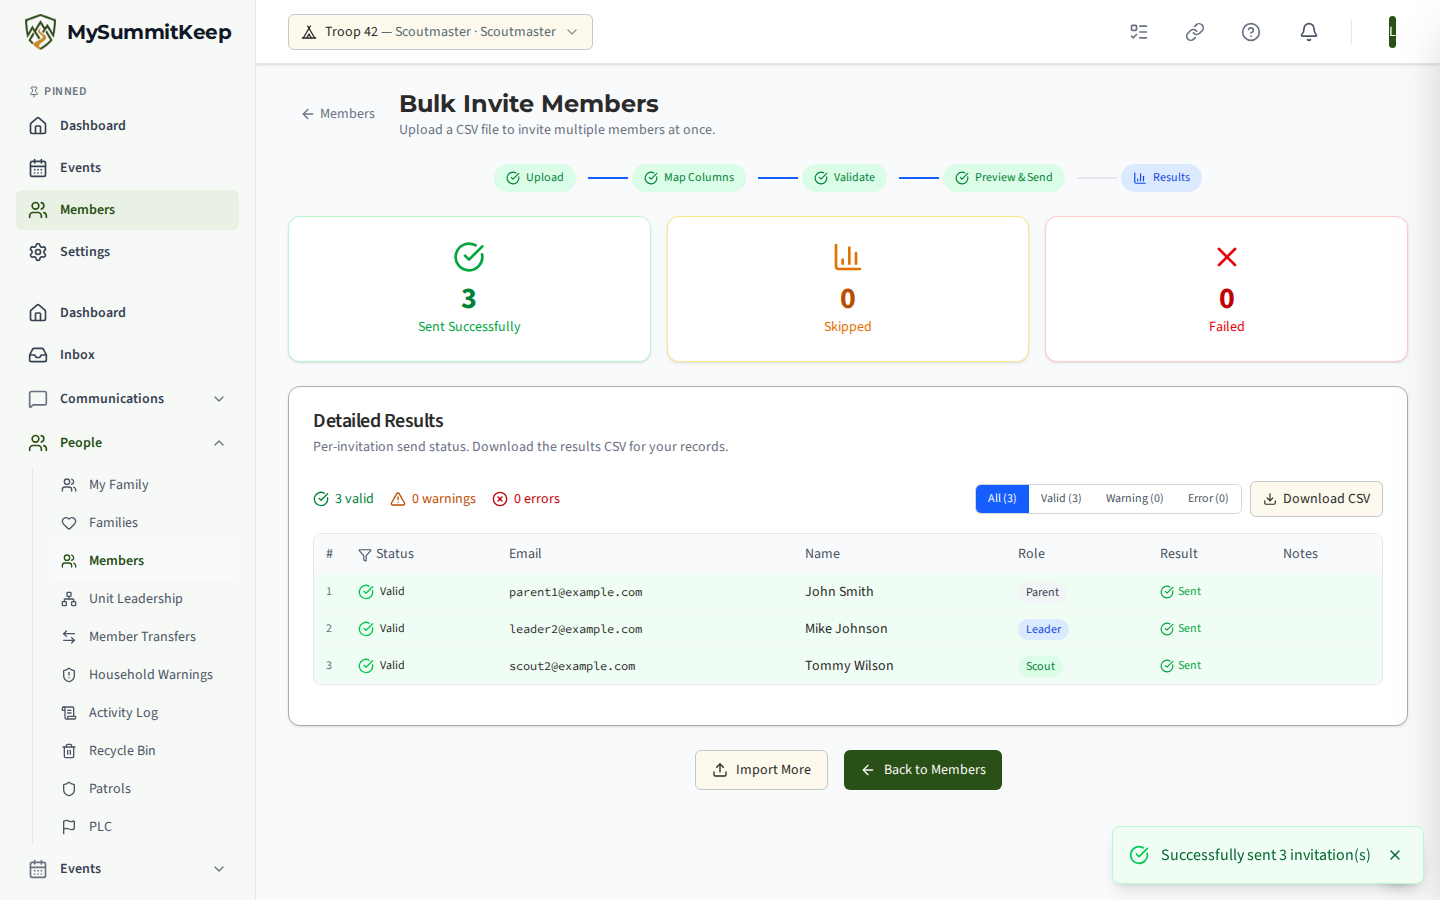
A “skipped” result usually means that person was already invited or already a member, so no duplicate invitation was created. From here you can Import More to run another batch or go Back to Members.
Bulk Operations: selecting members
Section titled “Bulk Operations: selecting members”Open Members → Bulk Operations. The page loads your current members in a checklist (up to 100 at a time). Tick the people you want to act on, or use Select All / Deselect All. The selection count is shown so you always know how many members an action will affect.
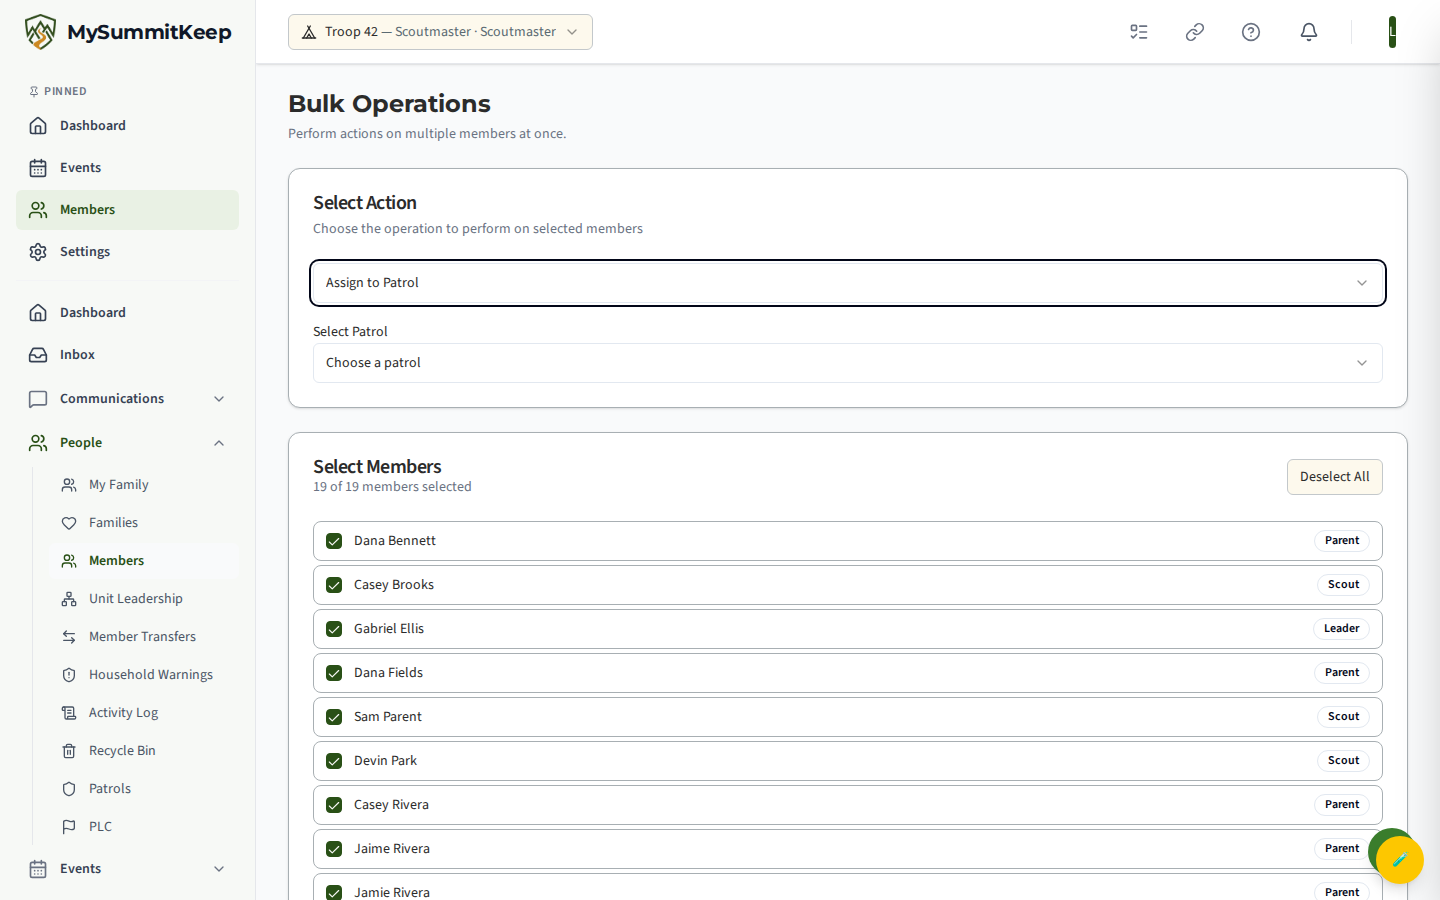
Choose what to do from the Select Action dropdown. Each action reveals its own short form, and the Execute button changes its label and icon to match. The available actions are below.
Assign to or remove from a patrol
Section titled “Assign to or remove from a patrol”- Assign to Patrol — pick a patrol from the dropdown (your unit’s patrols are listed), then execute. The selected members are added to that patrol.
- Remove from Patrol — unassigns the selected members from their current patrol. They stay active members of the unit; only the patrol assignment is cleared.
Sending a bulk message
Section titled “Sending a bulk message”Choose Send Message, fill in a Subject and Message body, and execute. The message is sent to all selected members. Both the subject and body are required.
Exporting selected members to CSV
Section titled “Exporting selected members to CSV”Choose Export to CSV and execute. This downloads a file with each selected member’s name, email, phone, role, and status. The export is generated instantly in your browser — no server request, no waiting.
Updating rank, member type, or role in bulk
Section titled “Updating rank, member type, or role in bulk”- Update Rank — choose a rank (Scout through Eagle, plus Cub ranks like Lion, Tiger, Wolf, Bear, Webelos, and Arrow of Light) to apply to everyone selected. This updates their advancement record.
- Update Member Type — switch the selected members between Youth and Adult.
- Update Role — set the unit role to
Scout,Member,Parent,Leader, orAdmin.
Archiving members and tracking background jobs
Section titled “Archiving members and tracking background jobs”Choose Archive Members to mark the selected people inactive and remove them from active rosters. You can add an optional reason (for example “aged out” or “transferred”). Archived members are not deleted — their records are preserved and can be restored later. Archiving runs immediately and confirms with a toast.
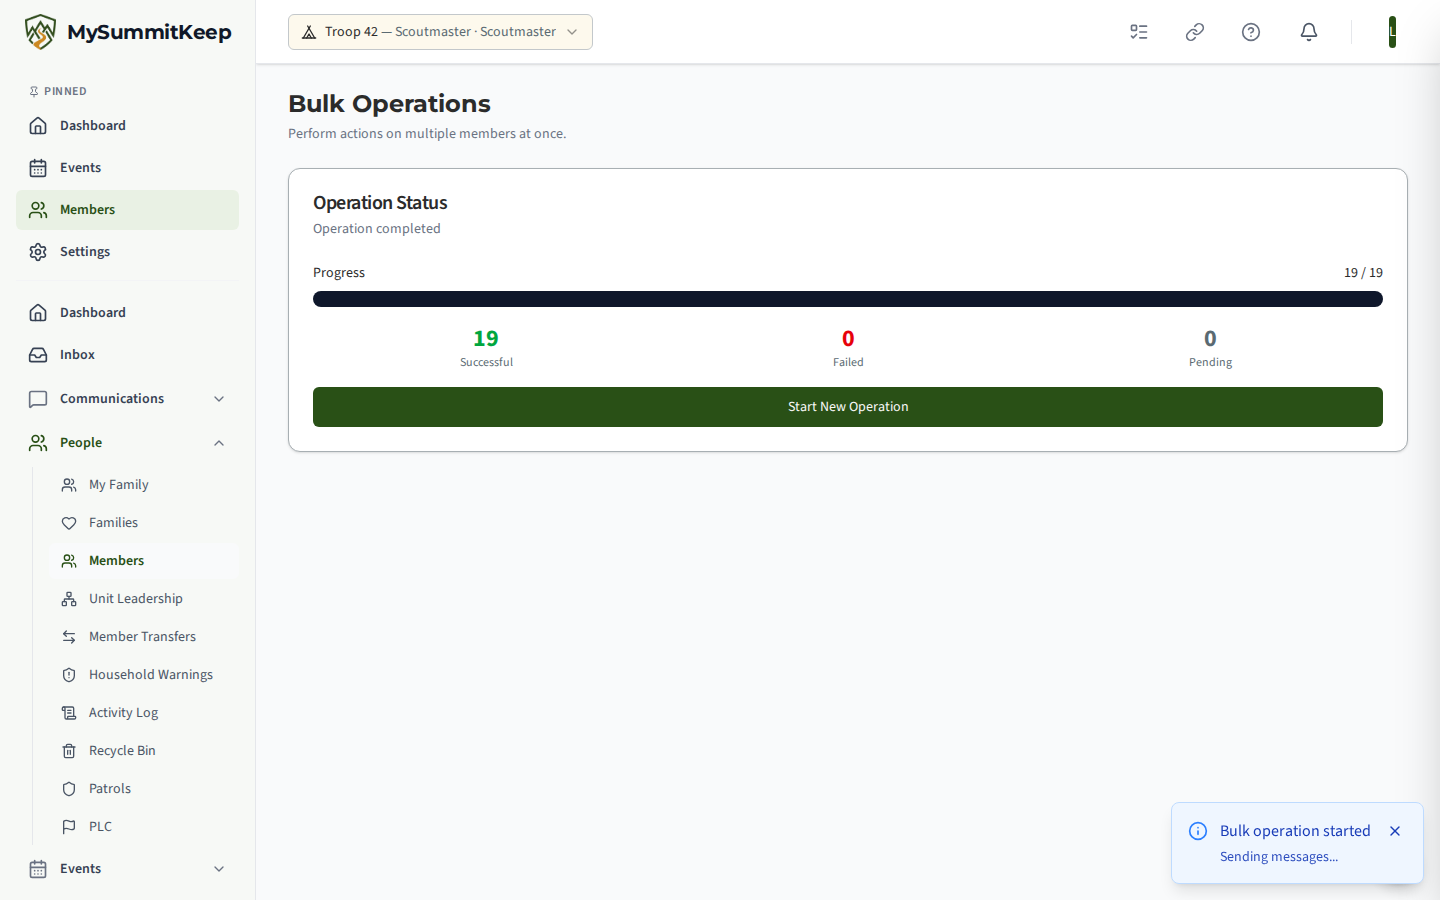
Two actions — Assign to Patrol and Send Message — run as a background job. An Operation Status card appears with a progress bar and live Successful / Failed / Pending counts that refresh every couple of seconds until the job completes. When it finishes, click Start New Operation to run another batch. Every other action — Remove from Patrol, Update Rank, Update Member Type, Update Role, Export to CSV, and Archive Members — completes immediately and simply shows a confirmation toast.