
Email Sending and Provider Settings
Every reminder, invitation, and announcement your unit sends has to come from somewhere. The Email page (under Settings → Email) is where you decide which service delivers that mail and confirm it reaches members’ inboxes instead of their spam folders.
You don’t have to touch this page at all — MySummitKeep sends email out of the box. Configure it only when you want messages to come from your own address or you’re sending in bulk.
Choosing an email provider
Section titled “Choosing an email provider”At the top of the page you pick one of three providers. The selected card is highlighted, and the options below it change to match.
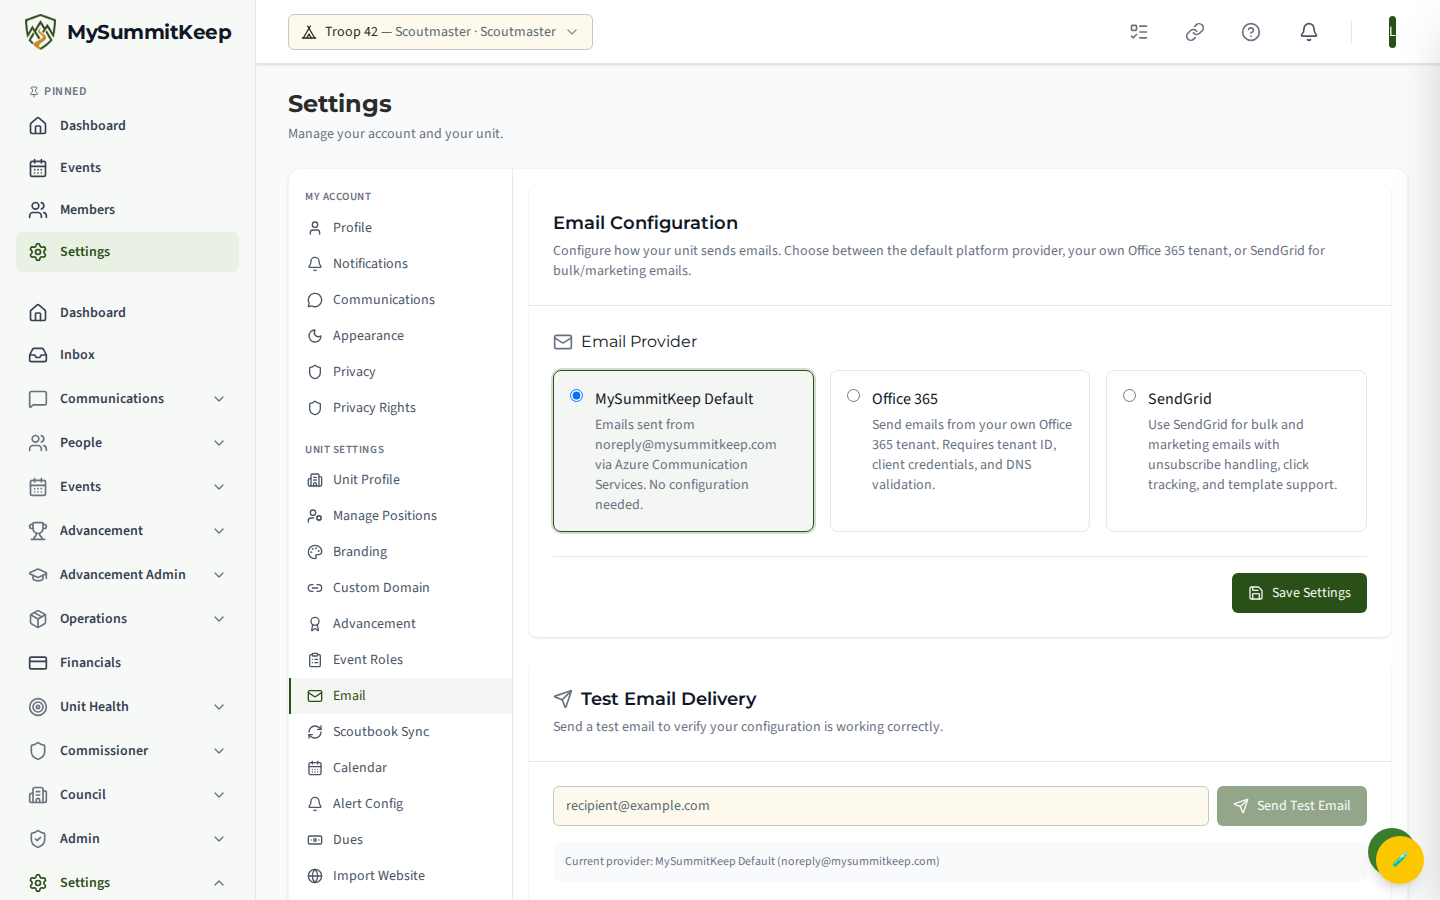
- MySummitKeep Default — the built-in option, powered by Azure Communication Services. No setup needed.
- Office 365 — send from your own Microsoft 365 tenant so mail comes from your unit’s real address.
- SendGrid — for bulk and marketing email with unsubscribe handling, click tracking, and templates.
After choosing, click Save Settings at the bottom of the Email Configuration card. Your choice applies to the whole unit.
Default (Azure Communication Services)
Section titled “Default (Azure Communication Services)”This is what every unit starts with. Emails go out from noreply@mysummitkeep.com through Azure Communication Services, and there is nothing to configure — deliverability is already handled by the platform.
Using your own Office 365 tenant
Section titled “Using your own Office 365 tenant”Choose Office 365 to send from your unit’s own Microsoft 365 address. Selecting it reveals the configuration fields.
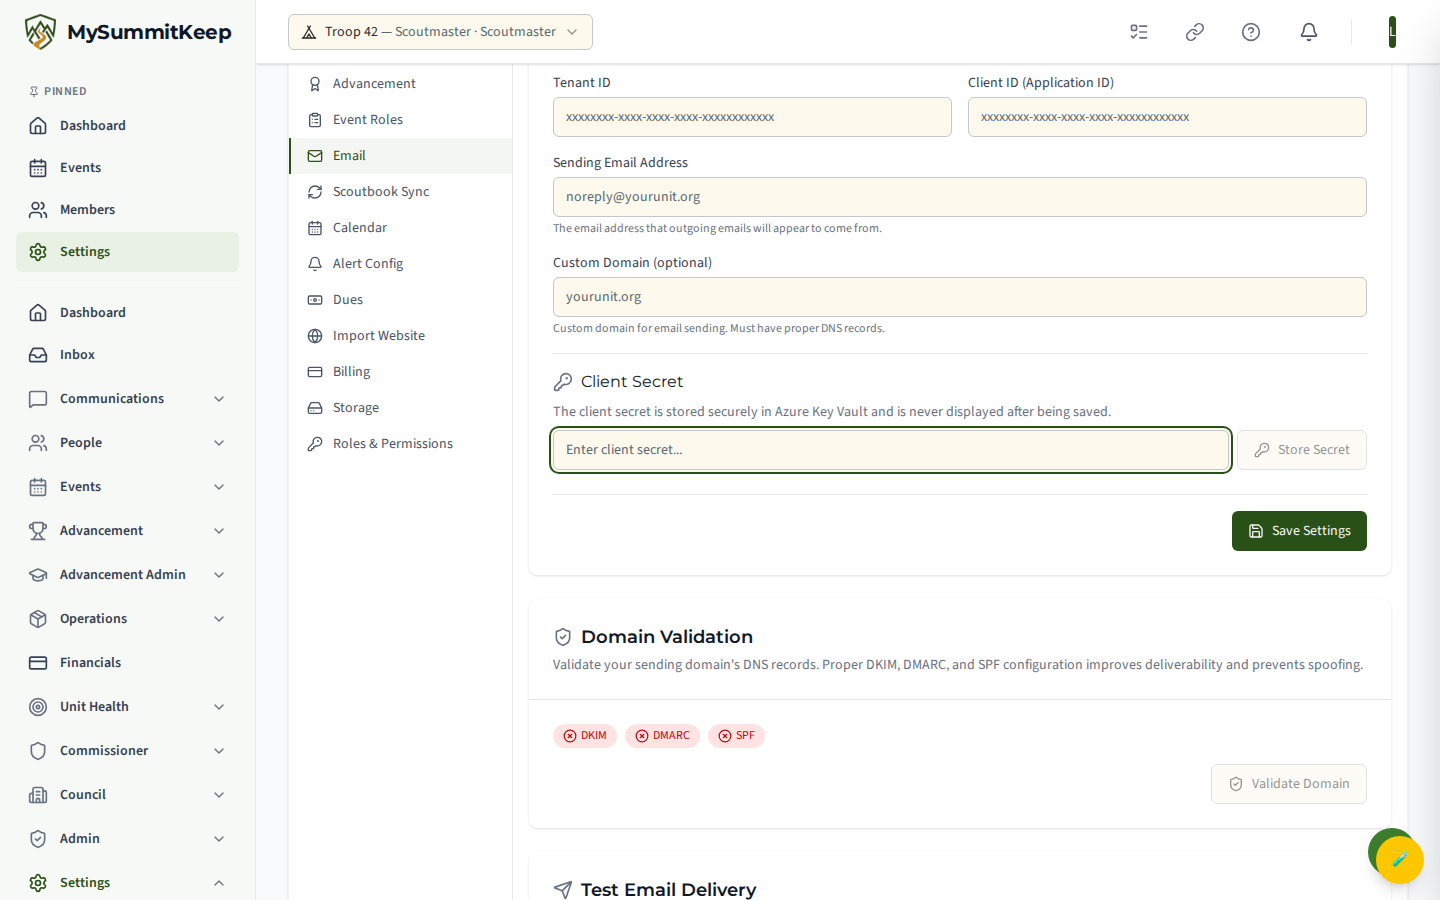
Fill in:
- Tenant ID — your Microsoft 365 directory (tenant) ID.
- Client ID (Application ID) — the app registration that grants send permission.
- Sending Email Address — the address outgoing mail will appear to come from, for example
noreply@yourunit.org. - Custom Domain (optional) — the domain used for sending, which must have valid DNS records.
The Client Secret is handled separately. Paste it in the field and click Store Secret. The secret is written straight to Azure Key Vault and is never shown again after saving — the database only keeps a reference to it, not the value itself.
Using SendGrid for bulk email
Section titled “Using SendGrid for bulk email”Choose SendGrid for high-volume and marketing email. Unlike Office 365, there are no credential fields to fill in here — the SendGrid API key is configured server-side in Azure Key Vault (secret name sendgrid-api-key). The page just lets you verify the connection and test it.
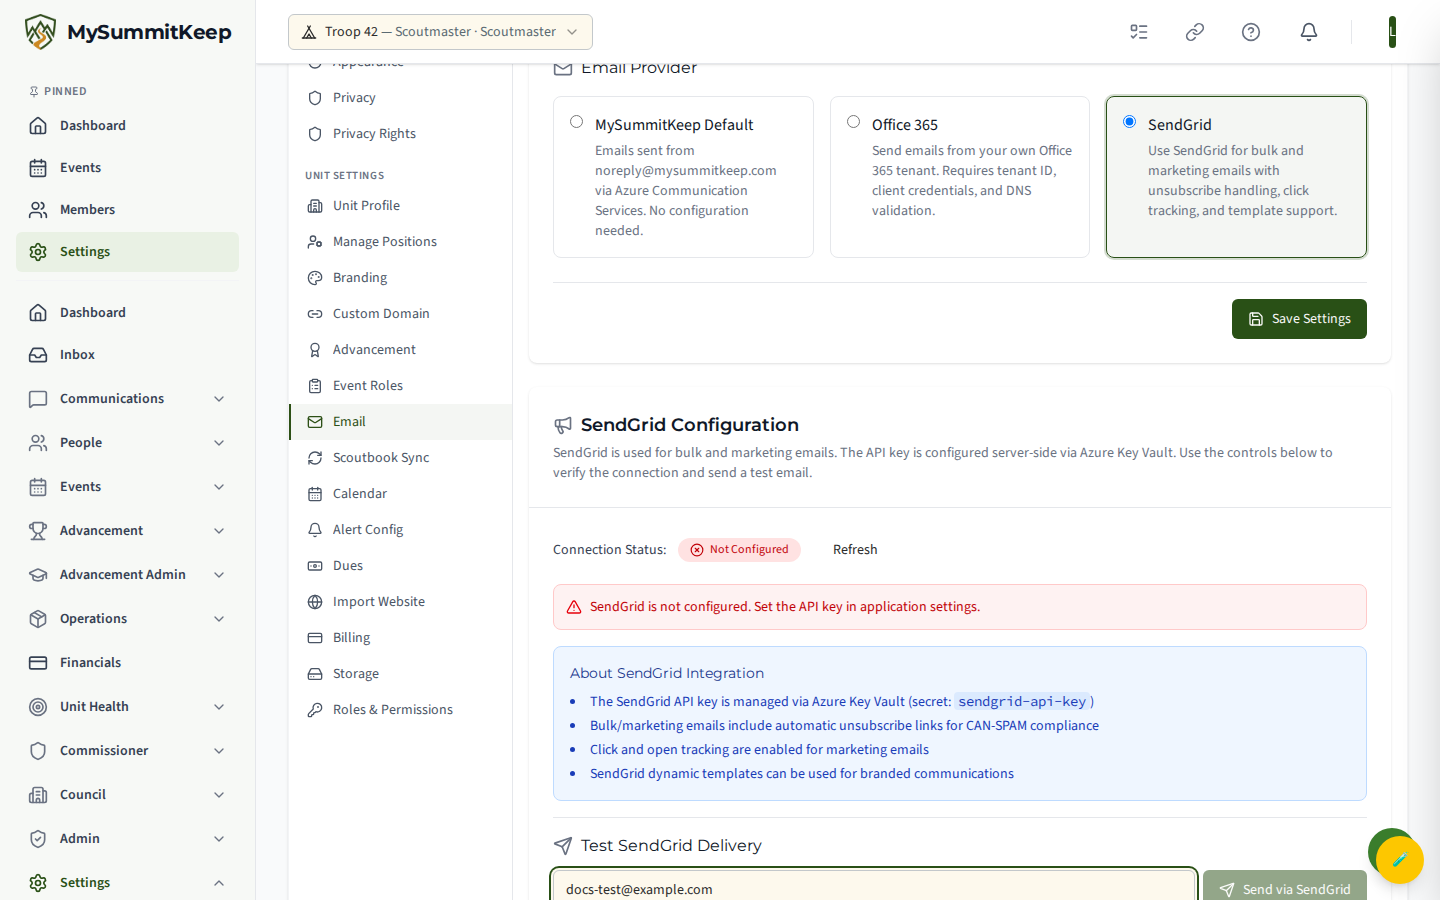
The Connection Status badge tells you where things stand:
- Connected — the API key works; the connected account email is shown alongside.
- API Key Set But Not Connecting — a key is present but the connection failed.
- Not Configured — no API key has been set yet.
Use Refresh to re-check after a configuration change. SendGrid sends include automatic unsubscribe links for CAN-SPAM compliance, plus click and open tracking. If the status shows Not Configured, contact MySummitKeep support to have the key added.
Validating your sending domain
Section titled “Validating your sending domain”The Domain Validation card appears only for Office 365. It checks the DNS records on your sending domain so mail isn’t rejected or marked as spoofed.
You’ll see a badge for each of DKIM, DMARC, and SPF, the date of the last check, and any specific issues found. Click Validate Domain to run the check — it uses the domain from your Sending Email Address, so that field must be filled in first.
Sending a test email
Section titled “Sending a test email”For the default provider and Office 365, a Test Email Delivery card lets you confirm everything works before real members rely on it.
Enter any address you can check and click Send Test Email. The message identifies the current provider and sending address, so when it arrives you know exactly which path delivered it. The card also shows your active provider — either Office 365 with its sending address, or the MySummitKeep default (noreply@mysummitkeep.com).
For SendGrid, use the Test SendGrid Delivery input in the SendGrid card instead. That send button is only enabled once the status shows Connected.
Deliverability tips (SPF/DKIM)
Section titled “Deliverability tips (SPF/DKIM)”Inbox placement comes down to your DNS records. If you send from your own domain (Office 365 or SendGrid with a custom domain), make sure all three are in place:
- SPF authorizes which servers may send for your domain.
- DKIM cryptographically signs your mail so receivers can confirm it wasn’t altered.
- DMARC tells receivers what to do when SPF or DKIM fails, and is what protects you from spoofing.
A green badge for each in Domain Validation is your sign the records are correct. Records can take time to propagate after a DNS change, so if a badge stays red, wait a bit and click Validate Domain again. The MySummitKeep default provider needs none of this — its domain is already configured for you.
Troubleshooting
Section titled “Troubleshooting”A test email never arrived. Check the recipient’s spam folder first. For Office 365, confirm the domain shows as validated; for SendGrid, confirm the status is Connected.
“Office 365 domain must be validated first.” Run Validate Domain and resolve any DKIM, DMARC, or SPF issues until the domain is verified, then retry the test.
The Validate Domain button is disabled. You haven’t entered a Sending Email Address yet, or you haven’t saved Office 365 as the provider. Fill that in and Save first.
SendGrid shows “API Key Set But Not Connecting” or “Not Configured.” The key is missing or invalid on the server. Click Refresh after any change, and contact MySummitKeep support if it persists.
Saving Office 365 reset my validation badges. That’s expected — changing the provider settings clears prior validation so stale results never mislead you. Just run Validate Domain again.
Once your provider is set and a test email lands cleanly, your unit’s outbound mail — invitations, reminders, and announcements — will all use it. See Communications and Bulk Invite and Operations for sending to your members.