
Patrol Box Inventory
A patrol box is the chuck box, tote, or footlocker your patrol hauls to every campout. Patrol Box Inventory gives every box a digital packing list so you always know what is inside, what is running low, and what is about to expire — before you are standing in a parking lot wondering whether anyone packed the matches.
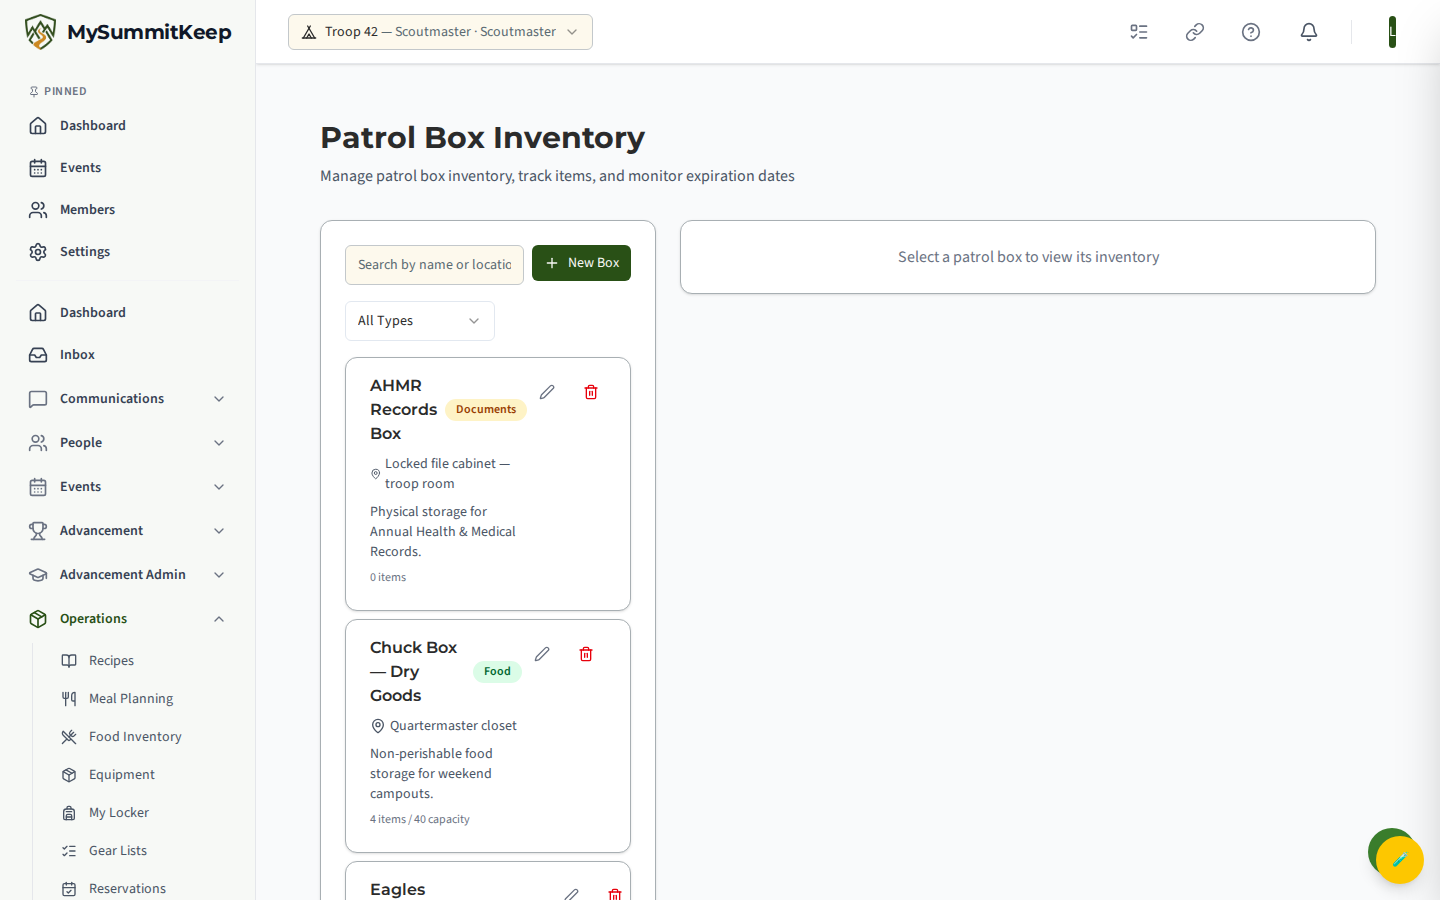
Open it from the left sidebar at Patrol Boxes (/patrol-boxes); the page itself is titled Patrol Box Inventory. It is split into two parts: a list of all your boxes on the left, and the details of whichever box you select on the right.
What a patrol box is
Section titled “What a patrol box is”Each box has a type that describes what it mostly holds:
- Equipment — tools, tents, cookware, camp gear
- Food — canned goods, dried staples, spices
- Supplies — first aid, cleaning, miscellaneous consumables
- Mixed — a multi-purpose box that holds a bit of everything
- Documents — health forms, BSA paperwork, and records
The type is only a label to help you organize and filter — every box can hold any kind of item. The list on the left shows each box’s name, a colored type badge, its storage location, and an item count (and capacity, if you set one).
Creating and editing boxes
Section titled “Creating and editing boxes”Click New Box at the top of the box list to open the Create New Patrol Box form. Fill in:
- Box Name (required) — for example, “Wolf Patrol Chuck Box” or “Camp Kitchen”
- Description — optional notes about the box
- Box Type (required) — defaults to Mixed
- Location — where the box lives between trips (for example, “Storage shed” or “Camp trailer”)
- Capacity — an optional maximum item count; the box detail then shows a “used / capacity” figure
To change a box later, click the pencil (Edit patrol box) icon on its card in the list, adjust the fields, and choose Update Box. The trash icon deletes a box — and because deleting a box also removes every item inside it, the platform asks you to confirm first. Deletion is a soft delete, so the records are retired rather than permanently destroyed.
Adding inventory items
Section titled “Adding inventory items”Select a box, then click Add Item on the Inventory Items card to open the Add Inventory Item form:
- Item Name (required) — e.g., “Canned beans” or “Tent poles”
- Category (required) — Food, Equipment, Supplies, or Consumable (defaults to Supplies)
- Quantity and Unit (required) — pick a unit such as items, cans, boxes, lbs, cups, oz, grams, kg, liters, or ml
- Expiration Date — optional; see the next section
- Location in Box — optional, e.g., “Top shelf” or “Left compartment”
- Notes — optional free text
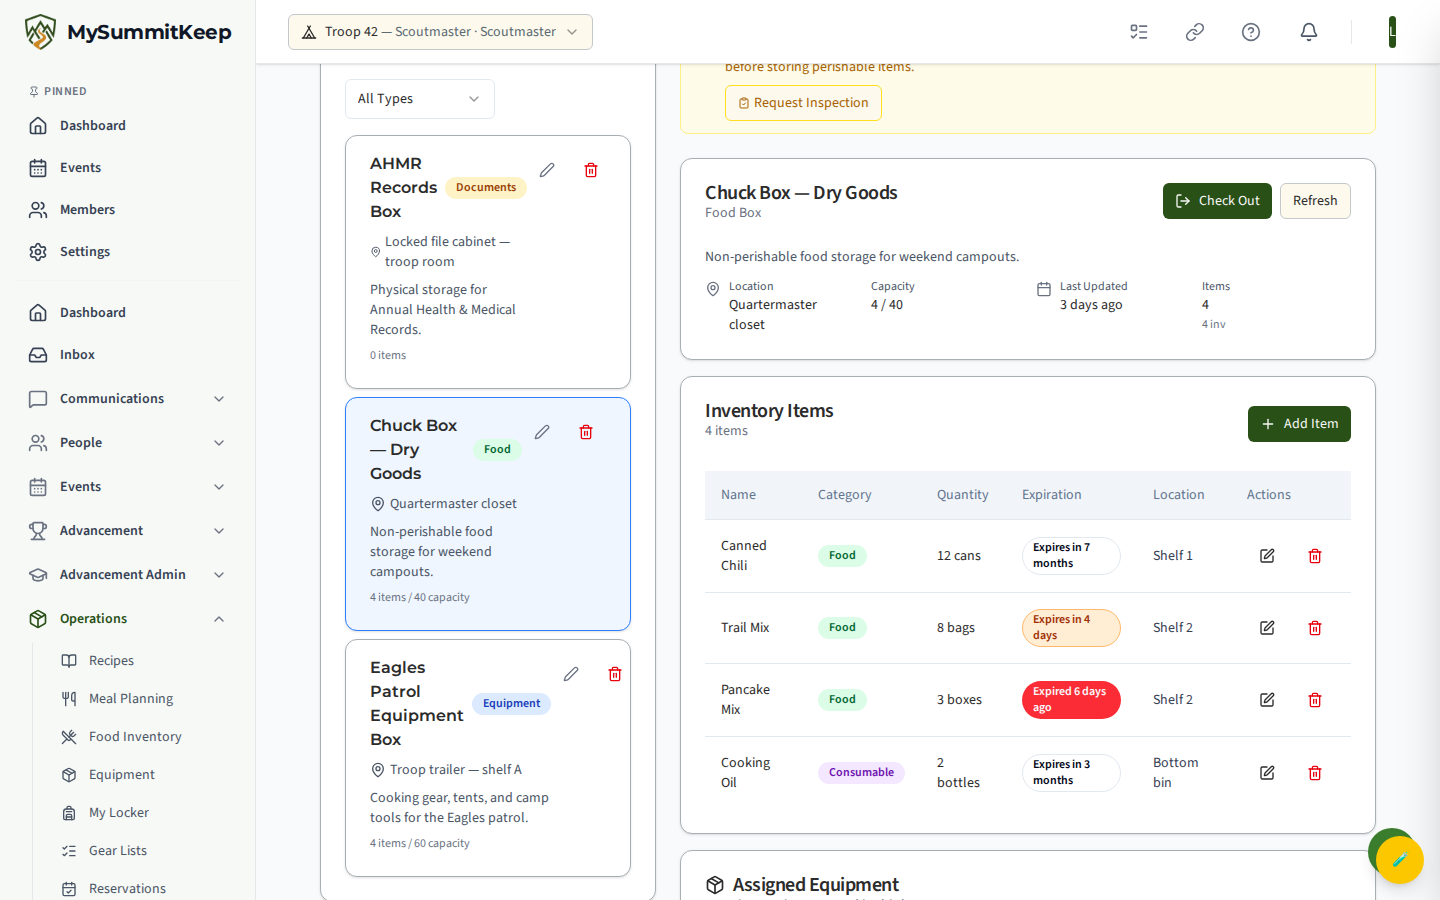
Each item appears in the box’s inventory table with its category badge, quantity, expiration status, and location. Use the pencil and trash icons in the Actions column to edit or remove an item.
Expiration tracking and the expiring-items view
Section titled “Expiration tracking and the expiring-items view”When you give an item an expiration date, the platform watches it for you. In the inventory table each item shows a status badge: a gray Expires in… for items with time to spare, an orange Expires… badge once an item is getting close, and a red Expired badge once the date has passed.
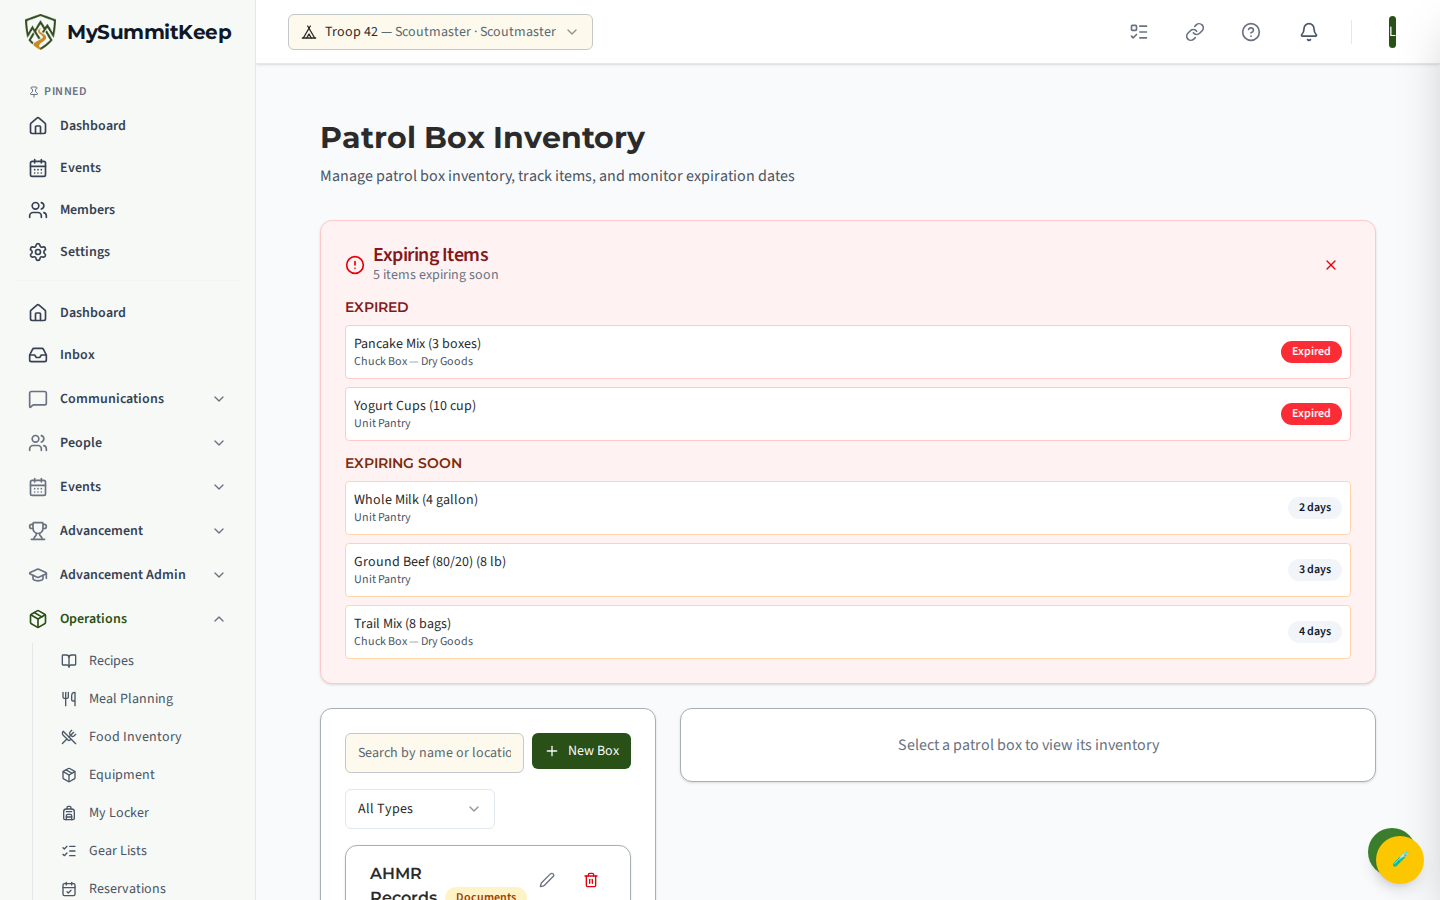
At the top of the page, an Expiring Items alert appears automatically whenever anything across all your boxes is expired or expiring soon. It groups items into EXPIRED and EXPIRING SOON, showing each item’s name, quantity, and the box it lives in. Items in the EXPIRED group carry a red Expired badge, while those in EXPIRING SOON show how many days remain. Dismiss it with the X for the current session; it returns next time you open the page if items are still at risk.
Searching inventory
Section titled “Searching inventory”When a box is selected, a Summary / Search tab pair appears below the box detail. The Search tab searches items across all of your patrol boxes at once — handy when you cannot remember which box holds the spare propane.
Type in the Search by item name field and optionally narrow by category with the dropdown (All Categories, Food, Equipment, Supplies, or Consumable). Results show each match’s name, category, quantity, the patrol box it lives in, and its expiration status, with a count of results found.
Checking gear out and back in
Section titled “Checking gear out and back in”When a box leaves for a trip, check it out so everyone knows where it is. On the box detail header, click Check Out to open the Check Out Patrol Box dialog:
- Checked Out By (required) — pick the Scout taking the box; leave it blank to default to you
- Return By (required) — the date the box is due back
- Associated Event — optionally tie the checkout to an upcoming event; choosing one can auto-fill the return date from the event’s end date
- Notes — anything the returning Scout should know
All inventory items inside travel with the box, so you check out the whole box, not item by item. A checked-out box shows a Currently Checked Out banner with who has it, the due date, and the linked event; if the due date passes it flips to a red Overdue state.
When the box comes home, click Check In on the header and confirm. The box returns to storage with its contents and is available to check out again.
Box summary
Section titled “Box summary”The Summary tab gives an at-a-glance health check of the selected box: Total Items, Expiring Soon, Expired, and the number of distinct Categories, plus an “Items by Category” bar chart and a per-category breakdown of counts and total quantities. It is the fastest way to confirm a box is packed and nothing has gone bad before you load up.