
Event Roster, Roles & Attendance
An event roster is the working list of who is actually coming, where they sit, and what job they hold for the trip. MySummitKeep keeps that organized in two connected places: a Roster tab on the event itself, where you sort Scouts into patrols and hand out leadership roles, and a dedicated roster page for taking real attendance on the day. This guide walks both.
RSVP vs. attendance vs. roster
Section titled “RSVP vs. attendance vs. roster”These three words sound alike but mean different things, and the platform keeps them deliberately separate:
- RSVP / registration is the family’s promise to come. They sign up on the event page. See Event Planning for how registrations work.
- Roster is your organization of those registrants — which patrol each Scout is in, and who holds which youth leadership role for this event.
- Attendance is what actually happened: who showed up, who was a no-show, who left early. This is recorded on the day and never overwrites the RSVP.
Initializing the roster
Section titled “Initializing the roster”Open the event, then choose the Roster tab. The first time you visit, the roster is empty and shows “Roster Not Initialized.” Click Initialize Roster to pull every approved registrant into the roster as an unassigned pool. You’ll see a confirmation like “Roster initialized with 14 members.”
If new families register after you initialize, re-running the roster picks them up — you won’t lose existing patrol or role assignments. Initializing and managing the roster requires the EventRoster.Manage permission, so most committee members can view but not edit.
Patrol assignments
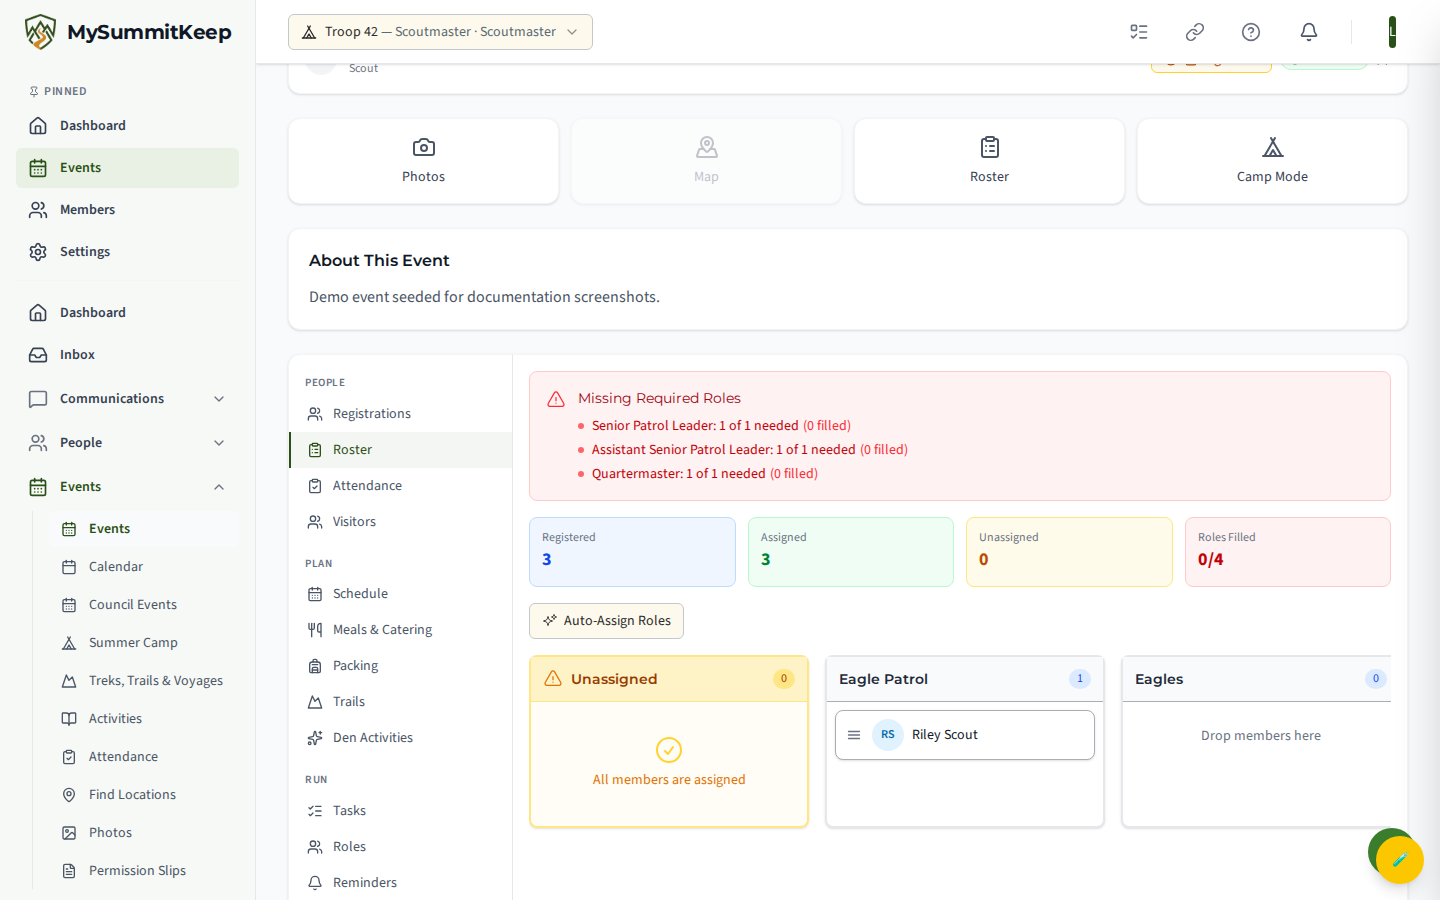
Section titled “Patrol assignments”Once initialized, the roster appears as a board: an Unassigned column on the left and one column per patrol. To place a Scout, drag their card from Unassigned into a patrol column — or move them between patrols the same way. The change saves immediately; there’s no separate “Save” step for patrol moves.
The summary bar at the top tracks assigned to patrol vs. unassigned so you can see at a glance whether anyone still needs a home.
Role assignments and templates
Section titled “Role assignments and templates”Beyond patrols, you can assign youth leadership roles (positions of responsibility) for the event — a senior patrol leader, a quartermaster, a grubmaster, and so on. Assigning roles requires the EventRoster.AssignRoles permission (it is youth-prohibited, so only adults can do it). On a member card, click the small + (add role) button to open the Assign Role panel, pick a Position from the dropdown, add optional Notes, and click Assign. The role then shows as a chip on the card; click the small remove control on a chip to take it back off.
Each event type carries a role template that defines the standard positions an event of that kind should have, and how many of each are required. That template is what powers gap detection and auto-assign below.
Finding and filling gaps
Section titled “Finding and filling gaps”When the roster is missing a role its template requires, a red Missing Required Roles banner appears at the top of the board. It lists each unfilled position in the form:
Quartermaster: 1 of 1 needed (0 filled)
Work down the list, assigning roles until the banner clears. The roster summary’s “filled role slots” count and the banner update as you go.
Auto-assign
Section titled “Auto-assign”If your Scouts already hold permanent positions of responsibility, you don’t have to assign every event role by hand. Click Auto-Assign Roles (requires the EventRoster.AssignRoles permission). The platform reads the event type’s role template and matches it against members’ standing positions, filling the slots it can.
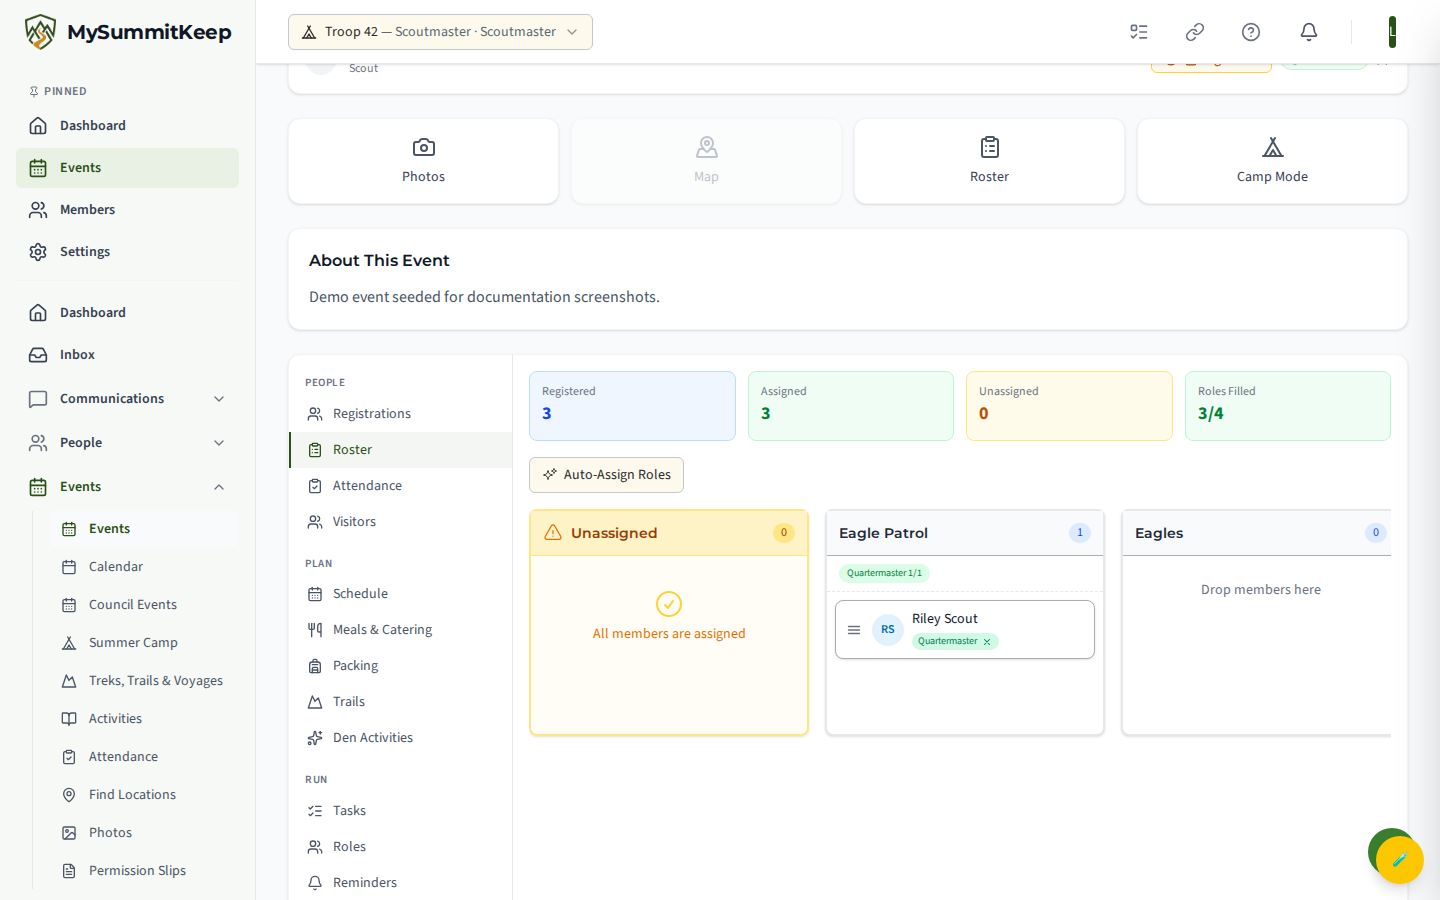
Auto-assign is additive and safe to re-run: it fills empty required slots without disturbing roles you set manually. If no role template exists for the event type, auto-assign reports that there was nothing to assign — set up a template for that event type first.
Taking attendance (roll call)
Section titled “Taking attendance (roll call)”Attendance lives on the dedicated roster page. From the event, use the Roster quick-action (visible to leaders and admins), which opens /events/:id/roster. The page opens on the Attendance tab and lists everyone who registered.
For each person, tap Present, Absent, or Excused right from the row; expand a row to also reach Late and Left Early. To speed up a full turnout, use Mark All Present — it marks only the people still unmarked, so it won’t clobber an Absent you already set. The stat cards at the top tally Registered, Present, Absent, and Excused live as you go.
Check-in / check-out
Section titled “Check-in / check-out”For events where arrival and departure times matter — lock-ins, day camps, anything with a sign-out sheet — expand a member’s row on the Attendance tab. There you’ll find Check-in Time and Check-out Time fields plus a Notes box (for example, “arrived late due to traffic”). Set the times, then click Save Details to record them on that person’s attendance entry.
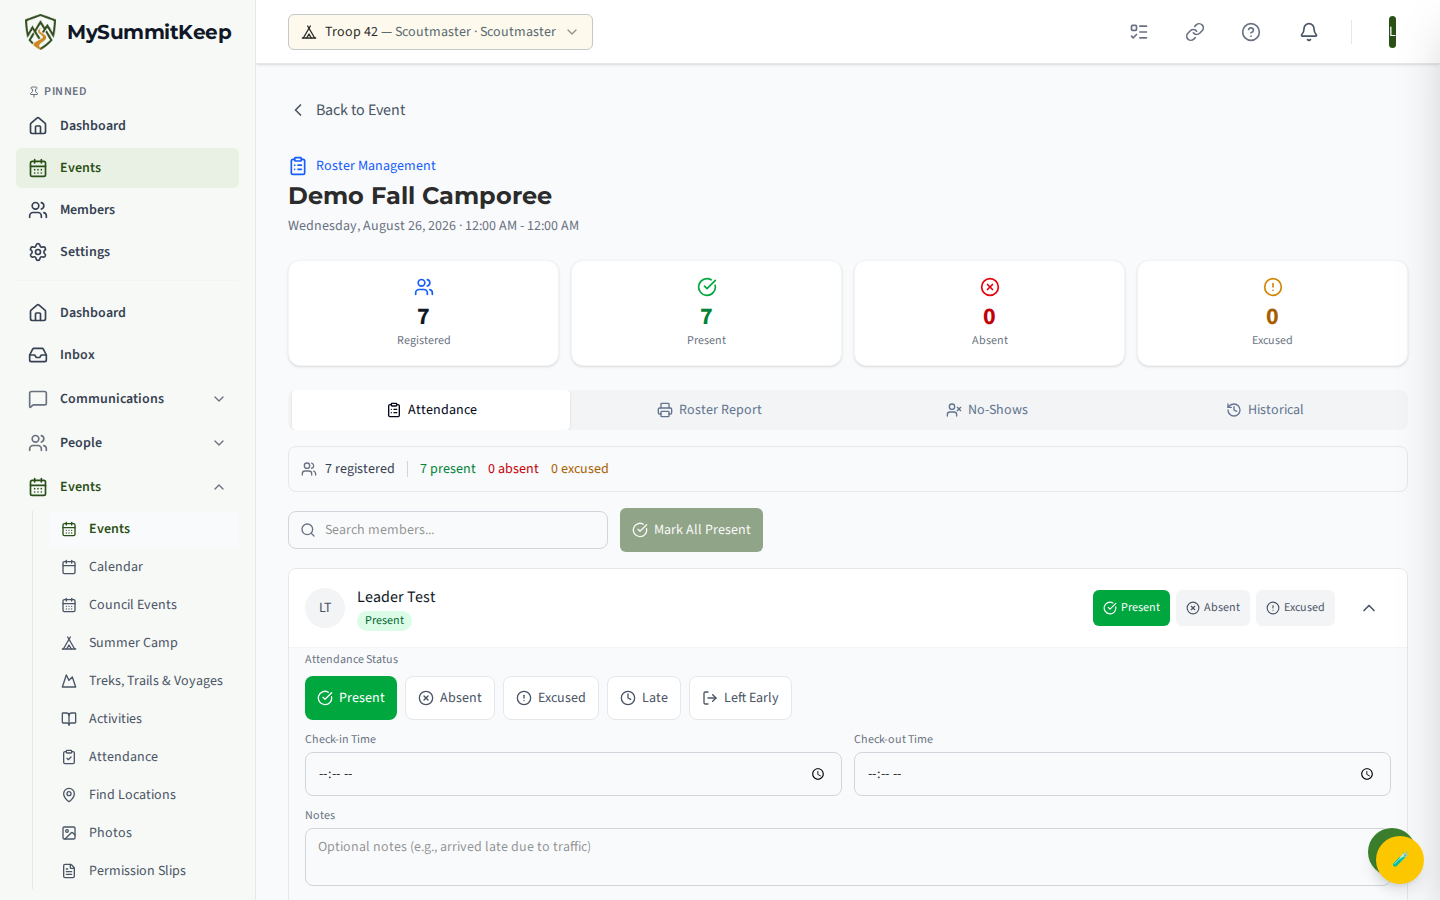
Recorded check-in and check-out times then appear inline on the member’s row (shown as “In:” and “Out:”), giving you a clean, auditable record of exactly who was on site and when.