
Equipment & Quartermaster
The Equipment area is your unit’s quartermaster system. It keeps a running inventory of tents, stoves, first-aid kits, and every other piece of gear the unit owns, and tracks who has it, where it lives, and when it is due back. Open it from the sidebar at Equipment.
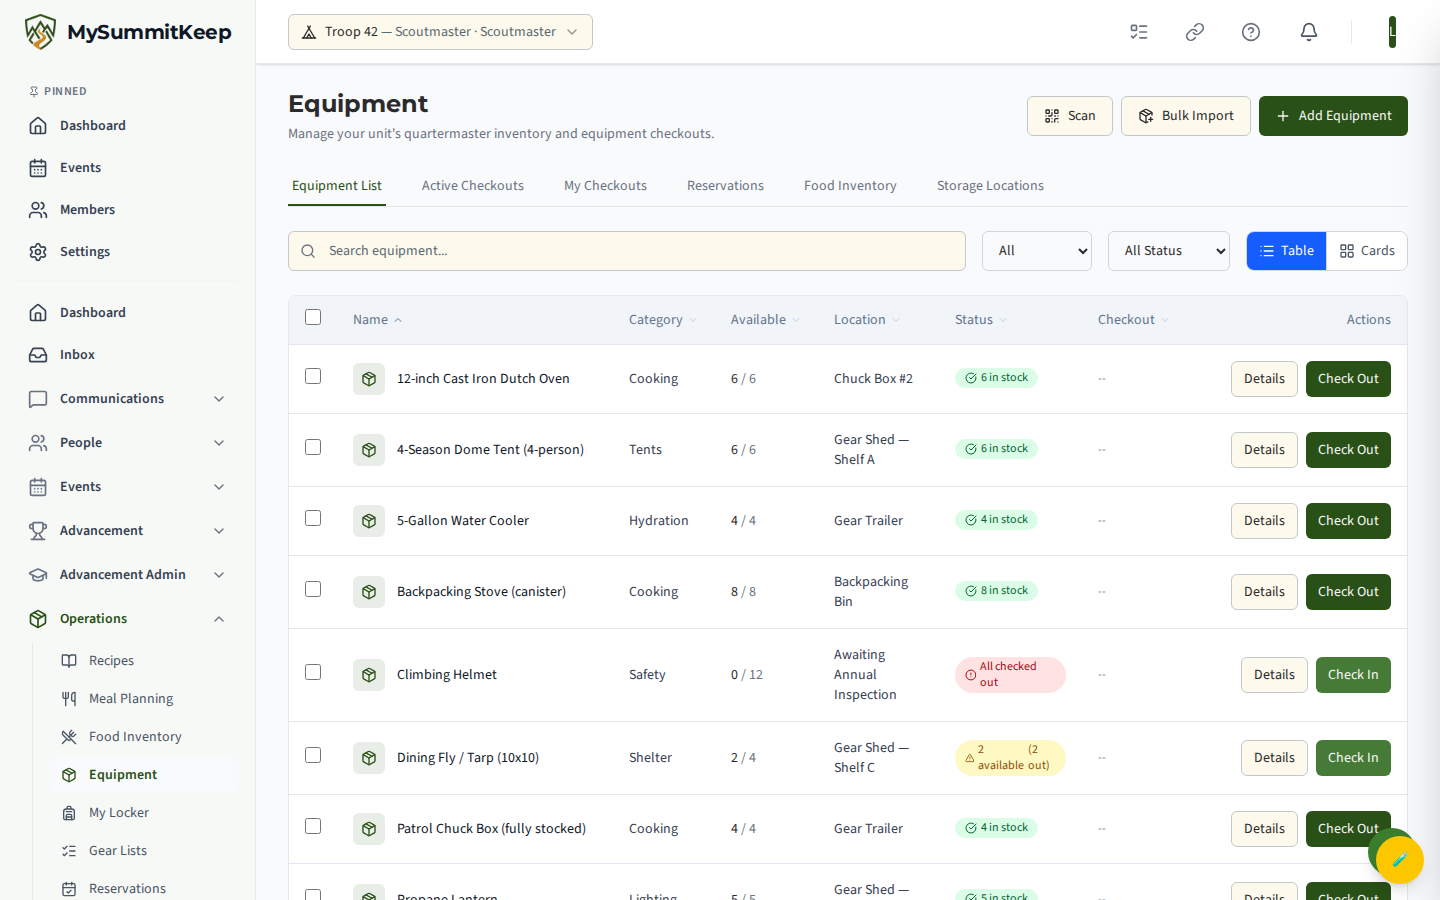
The equipment inventory
Section titled “The equipment inventory”The main page opens on the Equipment List tab. Each item shows its name, category, an availability badge, and the available-vs-total quantity (for example “3 / 5 available”). Use the search box to find an item by name, the Category dropdown (Camping, Cooking, Safety, Navigation, Tools, First Aid, Other) to narrow the list, and the status dropdown to show Available or Checked Out items only.
You can switch between Table and Cards views with the toggle on the right; your choice is remembered for next time. The list is paginated 20 items per page.
Across the top are additional tabs: Active Checkouts, My Checkouts, Reservations, Food Inventory, and Storage Locations. Storage Locations are shared with Patrol Boxes — assigning gear to a box keeps everything that travels together in one place.
Adding and cloning equipment
Section titled “Adding and cloning equipment”Select Add Equipment (top right) to open the new-item form. Only the Equipment Name and Total Quantity are required. The form is grouped into:
- Basic Information — name, description, category, and a Storage Location picked from your existing storage boxes.
- Quantity — total quantity plus a Minimum Quantity threshold for low-stock awareness.
- Purchase Information — purchase date, price, brand/manufacturer, model, serial number, and warranty notes.
- Additional Information — free-form notes.
When you have several identical items (say, ten of the same camp chair), add one, open it from its Details page, and choose Clone. Enter how many copies to create (1 to 100). Each clone copies the item’s metadata but starts with its own record at quantity 1, so they can be checked out independently.
Barcode and QR code scanning
Section titled “Barcode and QR code scanning”The Scan button (top of the Equipment page) opens the camera-based scanner at /equipment/scan, designed for phone use in the gear closet.
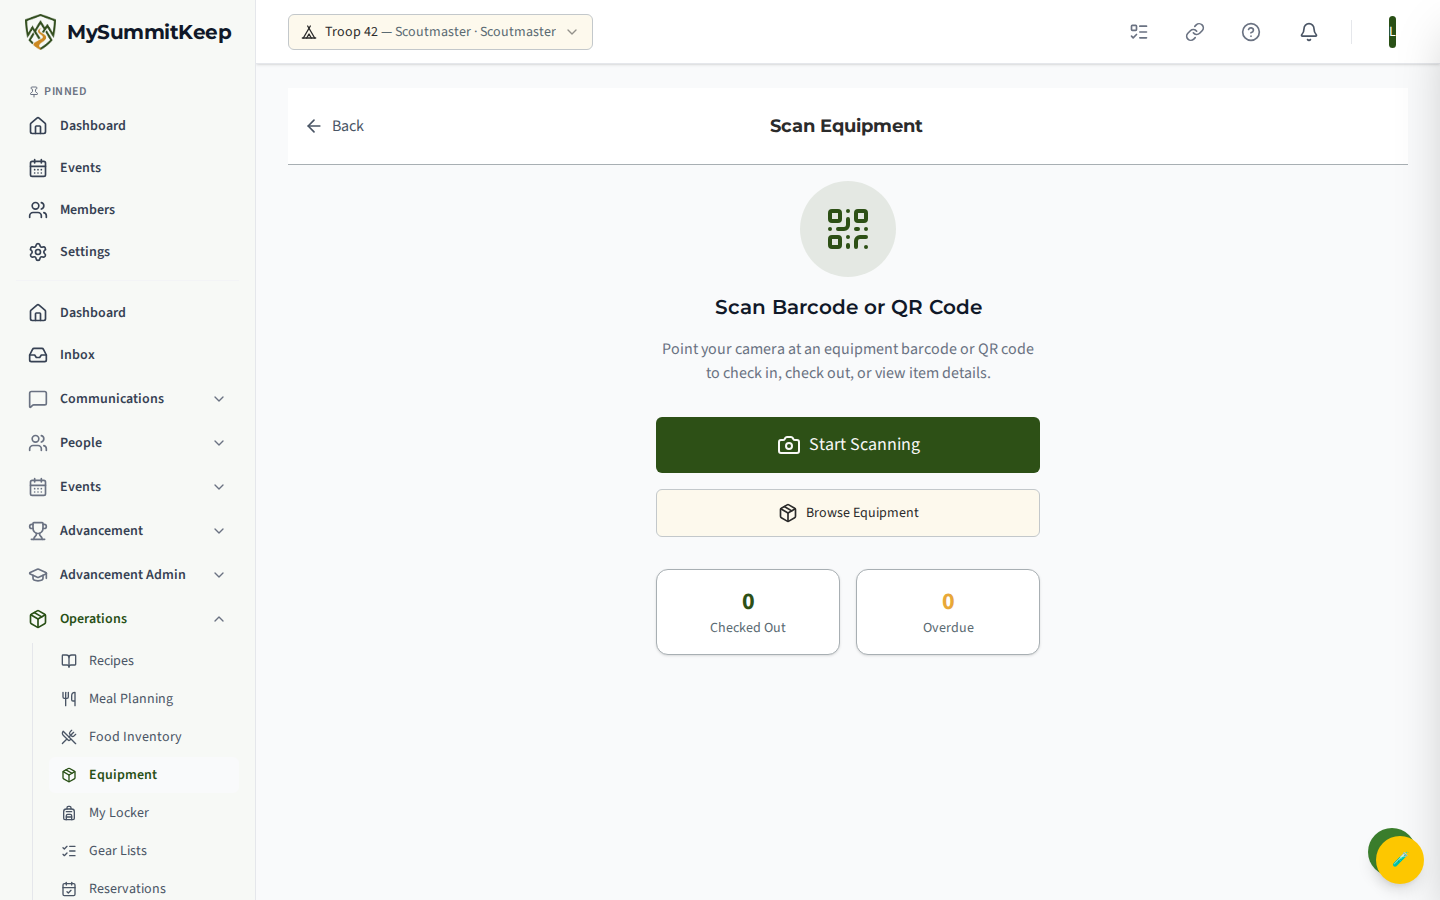
Tap Start Scanning and point your camera at a barcode or QR code. The scanner reads either a MySummitKeep QR code or a manufacturer barcode, looks the item up, and shows its name, category, and current status. From the result you can Check Out, Log Scan, or View Details. If nothing matches the code, you get a Register New Equipment shortcut.
To create a printable QR code for an item, open its Details page and select Generate QR. Print the code and affix it to the gear so any leader can scan it later. Items brought in through Bulk Import can also carry a manufacturer barcode, so the scanner recognizes the original packaging.
Checking equipment in and out
Section titled “Checking equipment in and out”You can check an item out from the list (the Check Out button on each available item) or straight from a scan. The checkout dialog records who the item is going to (defaults to you if you leave the picker blank), an optional linked event, and a due date.
When an item is out, its button switches to Check In. Checking in lets you record the item’s condition on return (Good, Minor Damage, Major Damage, or Lost) and any notes — useful for catching damage before the gear goes back on the shelf.
The Active Checkouts tab lists everything currently out across the unit, and My Checkouts shows only what is assigned to you. Overdue items are flagged so nothing gets quietly lost.
Equipment reservations
Section titled “Equipment reservations”A reservation holds gear for a future date without taking it off the shelf today. Open the Reservations tab, then Full Reservations Page, or go directly to /equipment/reservations.
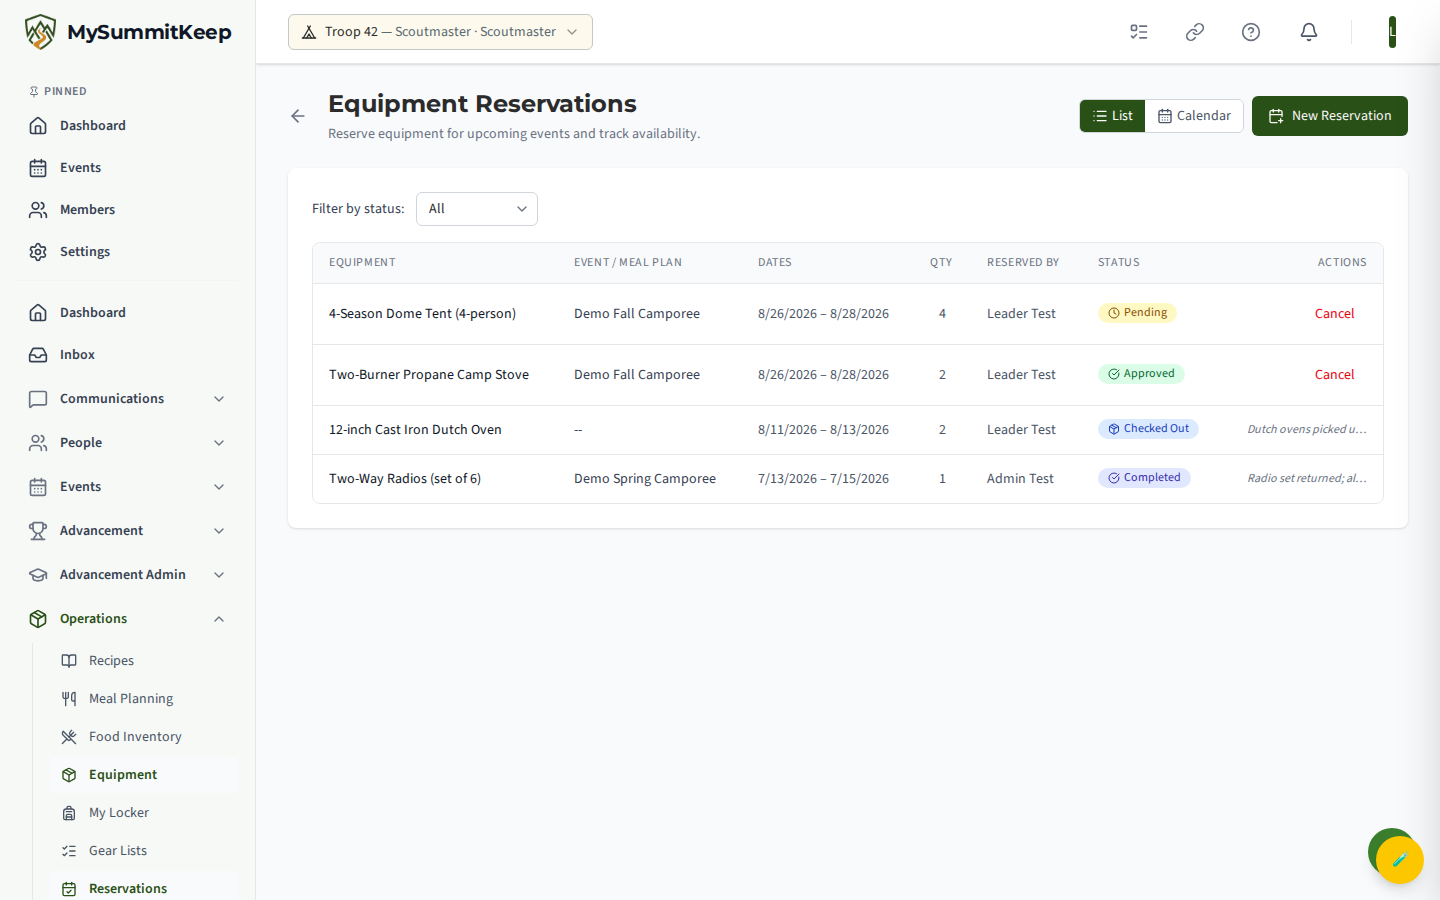
Use the New Reservation button to reserve an item for a date range, optionally tied to an event. Switch between List and Calendar views to see what is booked when. A leader or admin can Approve a pending reservation, and reservations can be Cancelled with a reason. Each item’s own detail page has a Reservations tab and a Calendar so you can check that single piece of gear’s availability.
Maintenance and status tracking
Section titled “Maintenance and status tracking”Every item carries a status — Available, Checked Out, Maintenance, Retired, Lost, or Damaged — shown on the scan result and detail views. The detail card also surfaces purchase price, current value, and warranty expiration so you can keep an eye on what a stove or harness is worth and when its coverage runs out.
The condition you record at check-in feeds this history, giving you a paper trail of how gear is holding up. Items that are checked out, or that have active or upcoming reservations, cannot be deleted — the platform protects gear that is in use.
Bulk operations and storage assignment
Section titled “Bulk operations and storage assignment”When you receive a shipment, Bulk Import (top right) lets you add many items at once instead of one form at a time. In Table view, tick the checkbox on multiple rows and an action bar appears — choose Assign Location to move the whole selection into one storage box in a single step. Pass an empty location to unassign.
Storage locations come from the Storage Locations tab (the same patrol boxes covered in Patrol Boxes), so the quartermaster always knows which trailer, shed, or box a piece of gear belongs in.
Permissions
Section titled “Permissions”Equipment actions are gated by role:
- Viewing the inventory, scan history, and reservations is open to members with equipment access.
- Add Equipment, Bulk Import, and Clone require the Equipment.Create permission; editing an item, assigning storage, generating a QR code, and logging maintenance require Equipment.Update.
- Check Out / Check In, recording scans, and creating or cancelling reservations require the Equipment.Checkout permission.
- Deleting an item requires the Equipment.Delete permission and only works when the item is free.
- Approving reservations is limited to leaders and admins.