
Getting Started as a Unit Leader
This guide walks you through your first hour with the platform as a new unit leader. By the end you will have claimed your unit, invited your Key 3, imported your charter roster, and set the basics — so your committee sees a real, populated dashboard the next time they log in.
Before you start
Section titled “Before you start”You will move faster with these handy:
- Your unit’s BSA charter number (on your most recent charter packet)
- The names and email addresses of your Committee Chair and Chartered Organization Representative
- A current roster export from ScoutBook or your council registrar (CSV or XLSX)
- The chartered organization’s mailing address
Claim your unit
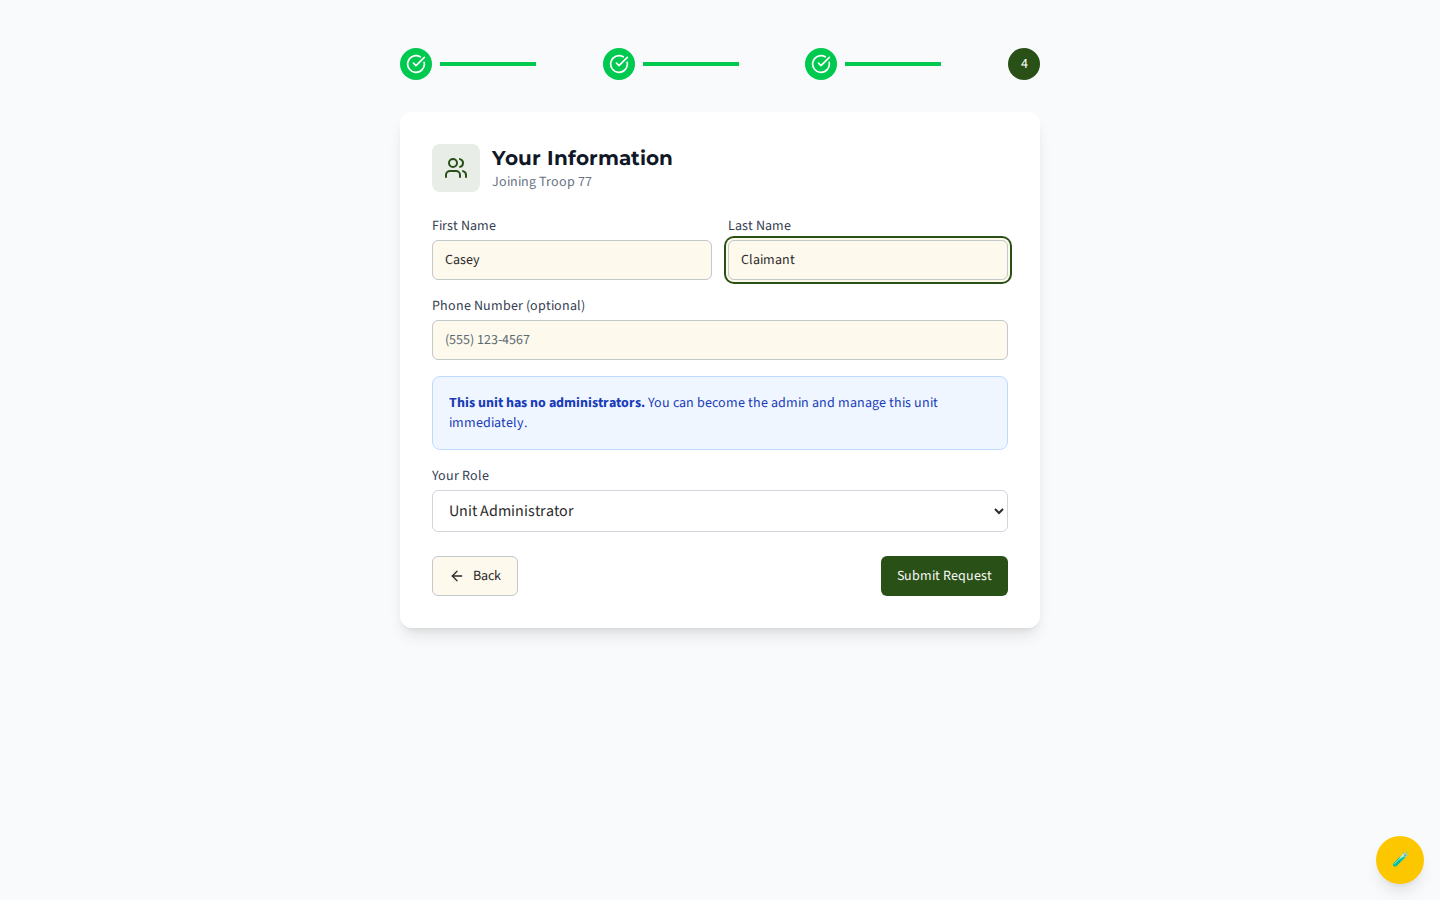
Section titled “Claim your unit”- Sign in for the first time. Use the email address that received your welcome message. Microsoft Entra walks you through a one-time verification.
- Pick your unit. If your council has already provisioned you, your unit appears on the landing page — select it to continue into your dashboard.
- Confirm your role. The platform asks whether you are a Scoutmaster, Cubmaster, Crew Advisor, or Skipper, which sets the default features you see.
Invite your Key 3
Section titled “Invite your Key 3”Your Key 3 — Unit Leader, Committee Chair, and Chartered Organization Rep — should all have logins on day one. The platform lets each Key 3 member act independently, so attendance, advancement, and finance work do not all funnel through one person.
Open Members from the sidebar. As a brand-new leader you will land on an empty directory with an Invite First Member button front and center.
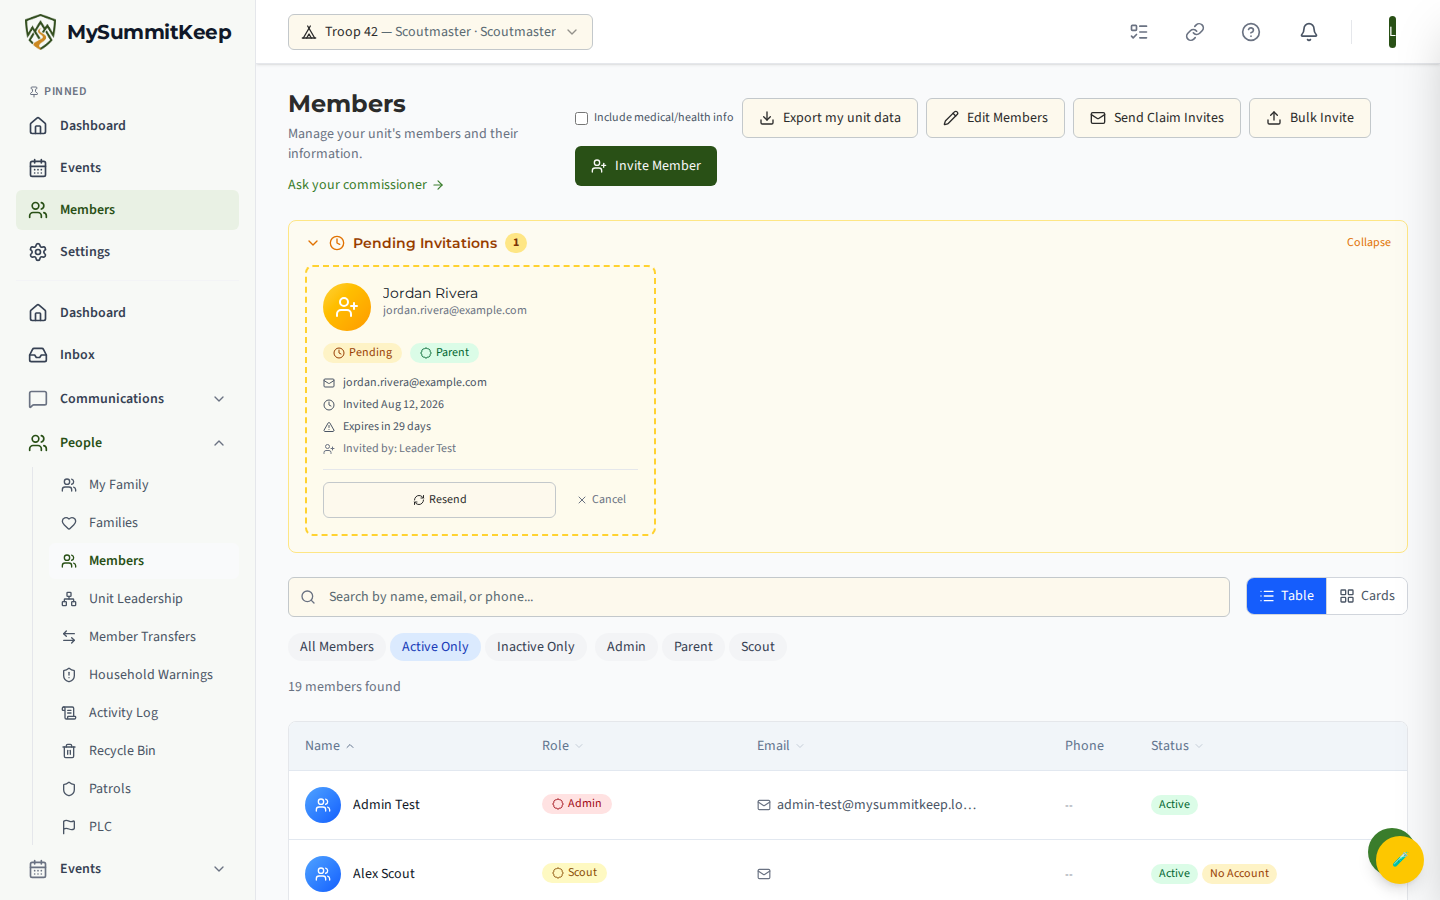
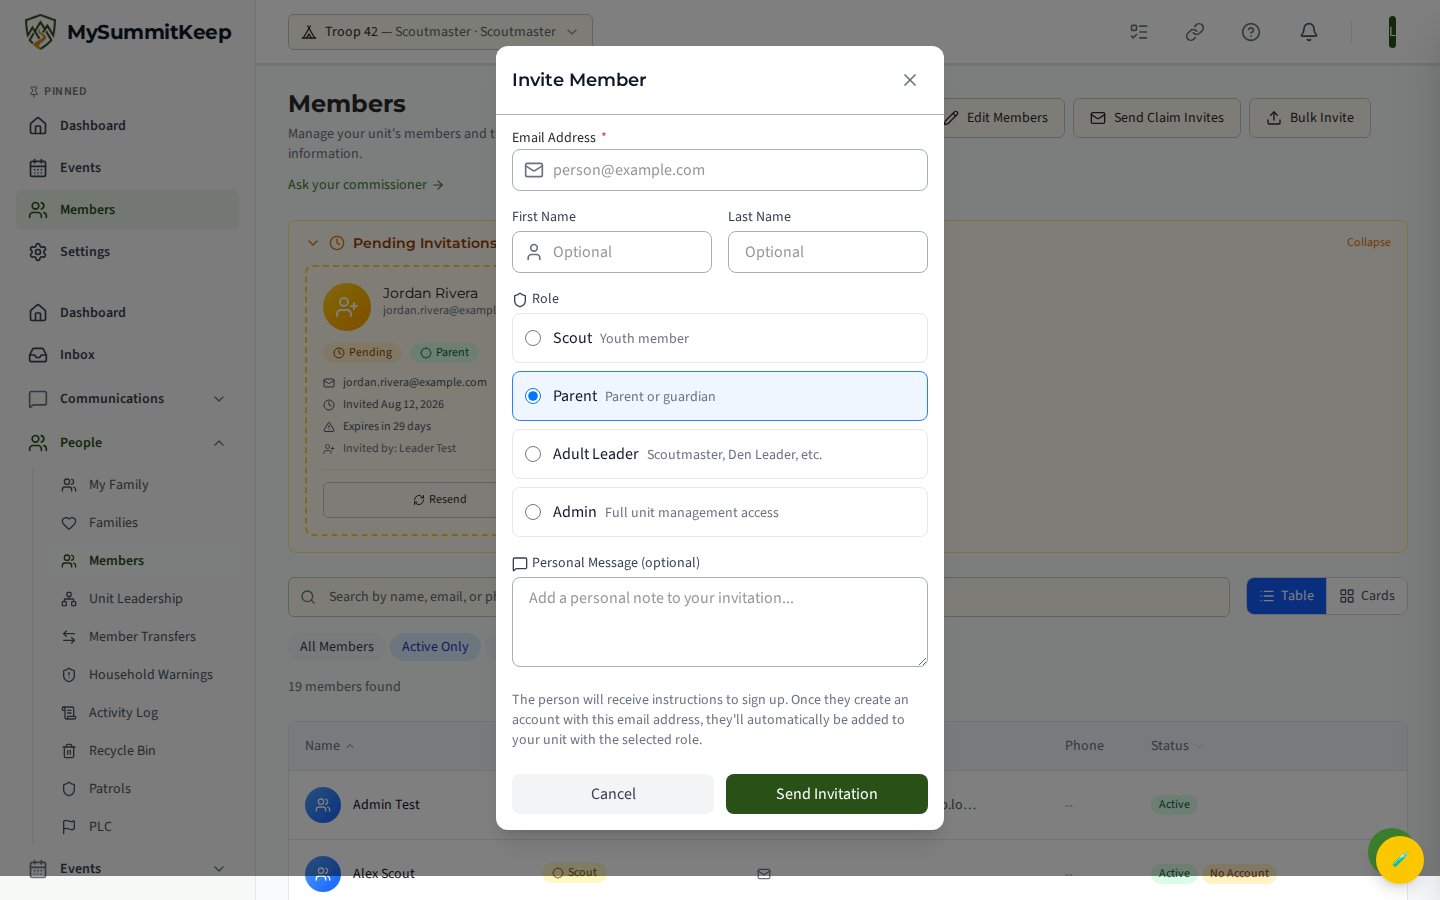
Click Invite First Member (or, once you have members, the Invite Member button in the page header) to open the invite form. Fill in the email address, an optional first and last name, and pick a role:
- Adult Leader — Scoutmaster, Assistant Scoutmaster, Den Leader, or any registered adult. This is the role to use for your Committee Chair and Chartered Org Rep.
- Parent — a parent or guardian.
- Scout — a youth member. Email is optional here, since many youth do not have their own address.
- Admin — full unit-management access.
You can add an optional personal message, then Send Invitation. The person receives a sign-up link by email; once they create an account with that address, they are added to your unit with the role you chose. Pending invites appear in a collapsible Pending Invitations panel on the Members page, where you can resend or cancel them.
Bulk-invite your committee and assistants
Section titled “Bulk-invite your committee and assistants”For more than a handful of people, Members → Bulk Invite is faster than the single-invite form. It is a five-step wizard: Upload → Map Columns → Validate → Preview & Send → Results.
- Upload or paste. Drag in a CSV or XLSX file, or paste rows directly. Use the Download Template button to grab a pre-formatted file with
email,firstName,lastName,role, andphonecolumns. - Map columns. The wizard auto-detects your headers; adjust any that did not line up. You must map at least the Email column to continue.
- Validate. Each row is checked for a valid, non-duplicate email. The wizard normalizes role names (for example, “ASM” or “Scoutmaster” become Leader) and flags anything questionable so you can fix or remove it.
- Preview & Send. Review the final list, add an optional welcome message for everyone, and send. Error rows are excluded automatically.
- Results. See how many invites sent, were skipped, or failed, with a per-row breakdown.
Configure unit settings
Section titled “Configure unit settings”Open Settings → Unit and fill in the General tab:
- Unit name and unit number (the unit type is set at creation and cannot be changed here)
- Charter organization and charter expiration date — we send proactive recharter reminders to your Key 3 as that date approaches
- Meeting day and time (drives default event scheduling)
- Meeting location (street address, city, state, ZIP — used in calendar invites)
- Contact email and phone, and your unit website
You can also turn on a public-facing page for your unit from this tab. None of this is locked — come back and adjust it any time. For the full walkthrough, see Unit Settings.
Run an import
Section titled “Run an import”Once your leaders are in, import the rest of your roster. Head to Member Import, drop in your CSV, and review the preview before committing — the importer maps columns automatically. Imported members start as Unclaimed until each parent or scout signs up and links their account. Full walkthrough: Member Import.
What to do next
Section titled “What to do next”- Schedule your first event in Event Planning.
- Record a recent advancement in Advancement Workflow.
- Send your first announcement in Communications.
- Get ahead of recharter season with Recharter.
Need help? Contact support — we usually respond within 1 business day.