
Member Import
If your unit is coming from another Scout management system, you do not have to retype your roster. The Import Wizard walks you through exporting from your old platform and loading the data into MySummitKeep — members, advancement, training, medical-form dates, event history, and even legacy photos.
Everything lives in one place: the Data Import & Export page.
Where to find it
Section titled “Where to find it”Open the Data Import & Export page at /import-export (it is its own page, not a tab inside Members). You will see two cards — Import Data and Export Data — and two history tabs below them.
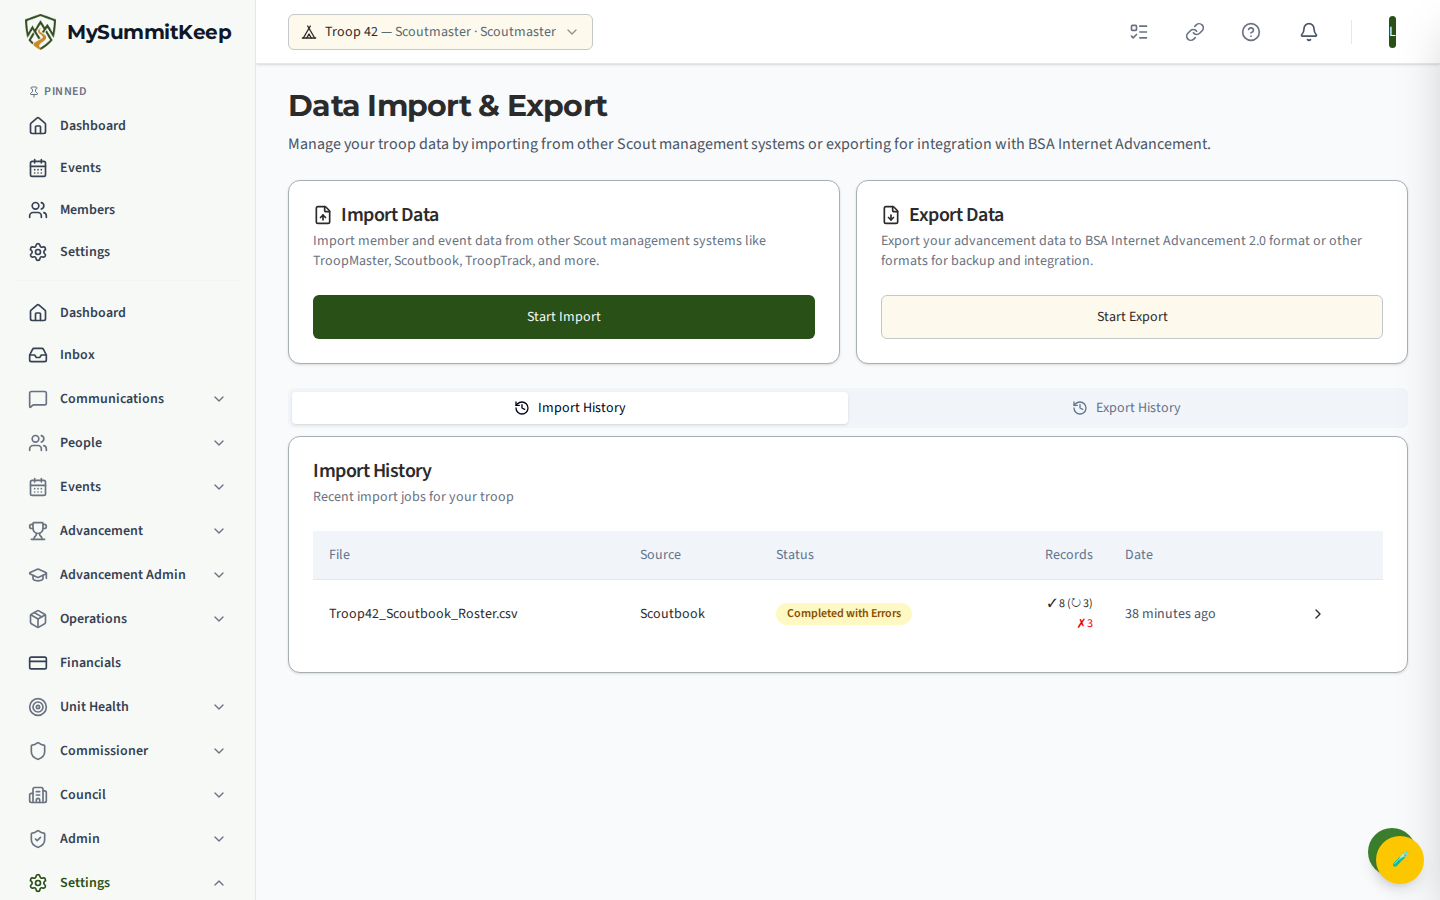
- Import Data → Start Import launches the wizard described below.
- Export Data → Start Export sends your advancement out as a BSA Internet Advancement 2.0 file (and other formats).
- Import History and Export History tabs list every job you have run, each linking to a detail view.
The Import Wizard, step by step
Section titled “The Import Wizard, step by step”The wizard is source-driven: you tell it which system you are leaving, and it shows you exactly how to get the file out of that system before you upload it.
1. Choose your source
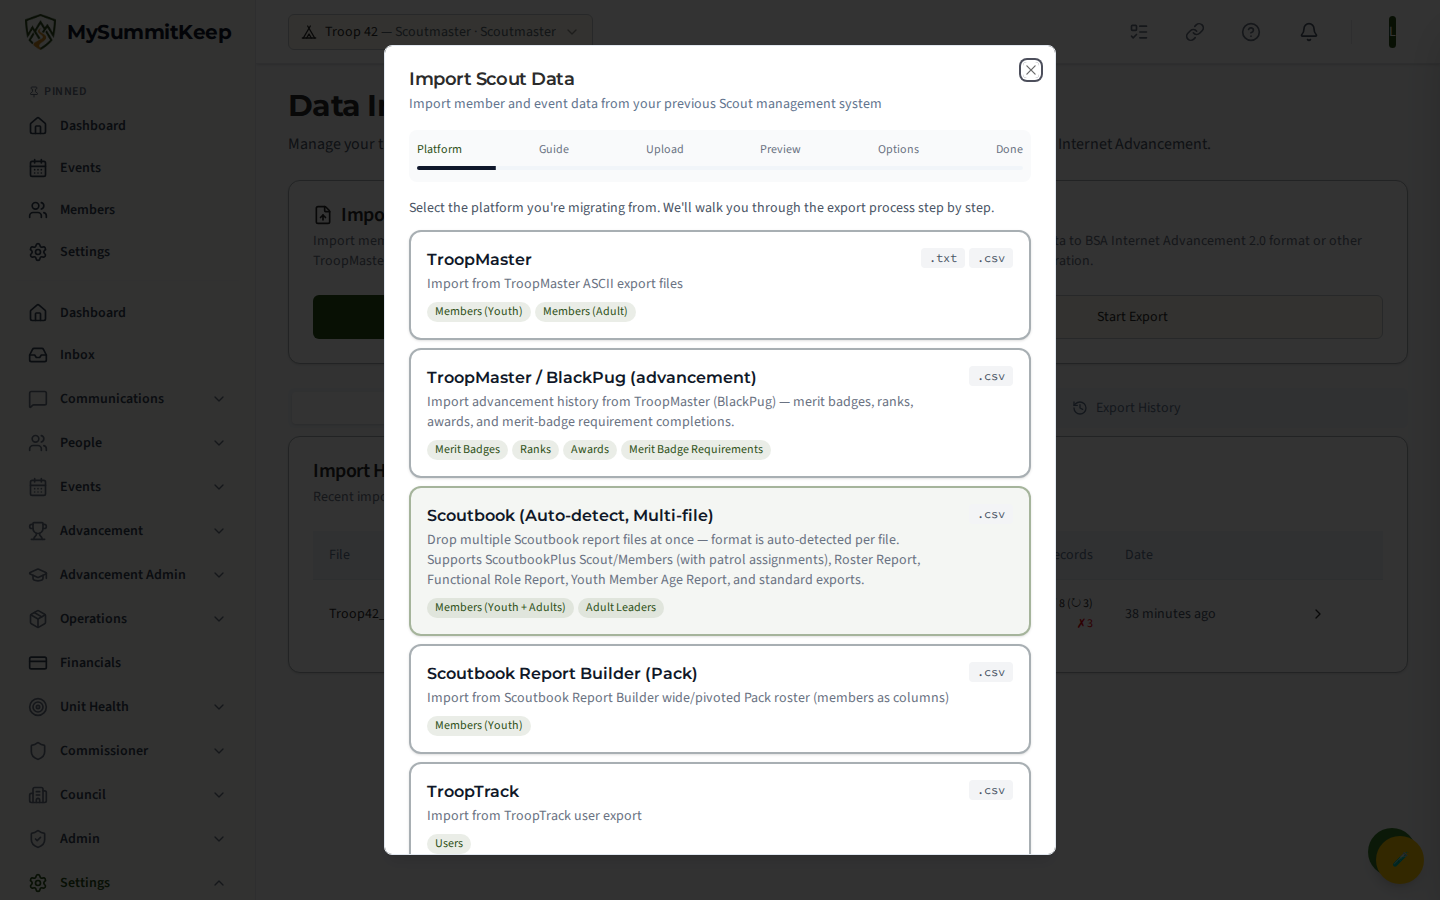
Section titled “1. Choose your source”Pick the platform you are migrating from. Supported sources include Scoutbook (auto-detect, multi-file), Scoutbook Report Builder (Pack), TroopMaster and TroopMaster / BlackPug (advancement), TroopTrack, TroopWebHost, ScoutManager, and a Generic CSV option for any spreadsheet with a header row. Each card shows the file types it accepts and the kinds of records it can bring in.
2. Pick what to import (some sources)
Section titled “2. Pick what to import (some sources)”Sources like TroopWebHost let you import different data types one at a time — full roster, patrol rosters, merit-badge history, current advancement, medical-form dates, adult training, swim tests, and legacy event photos. Each type is a separate export file, so you can run the wizard as many times as you need.
3. Follow the export guide
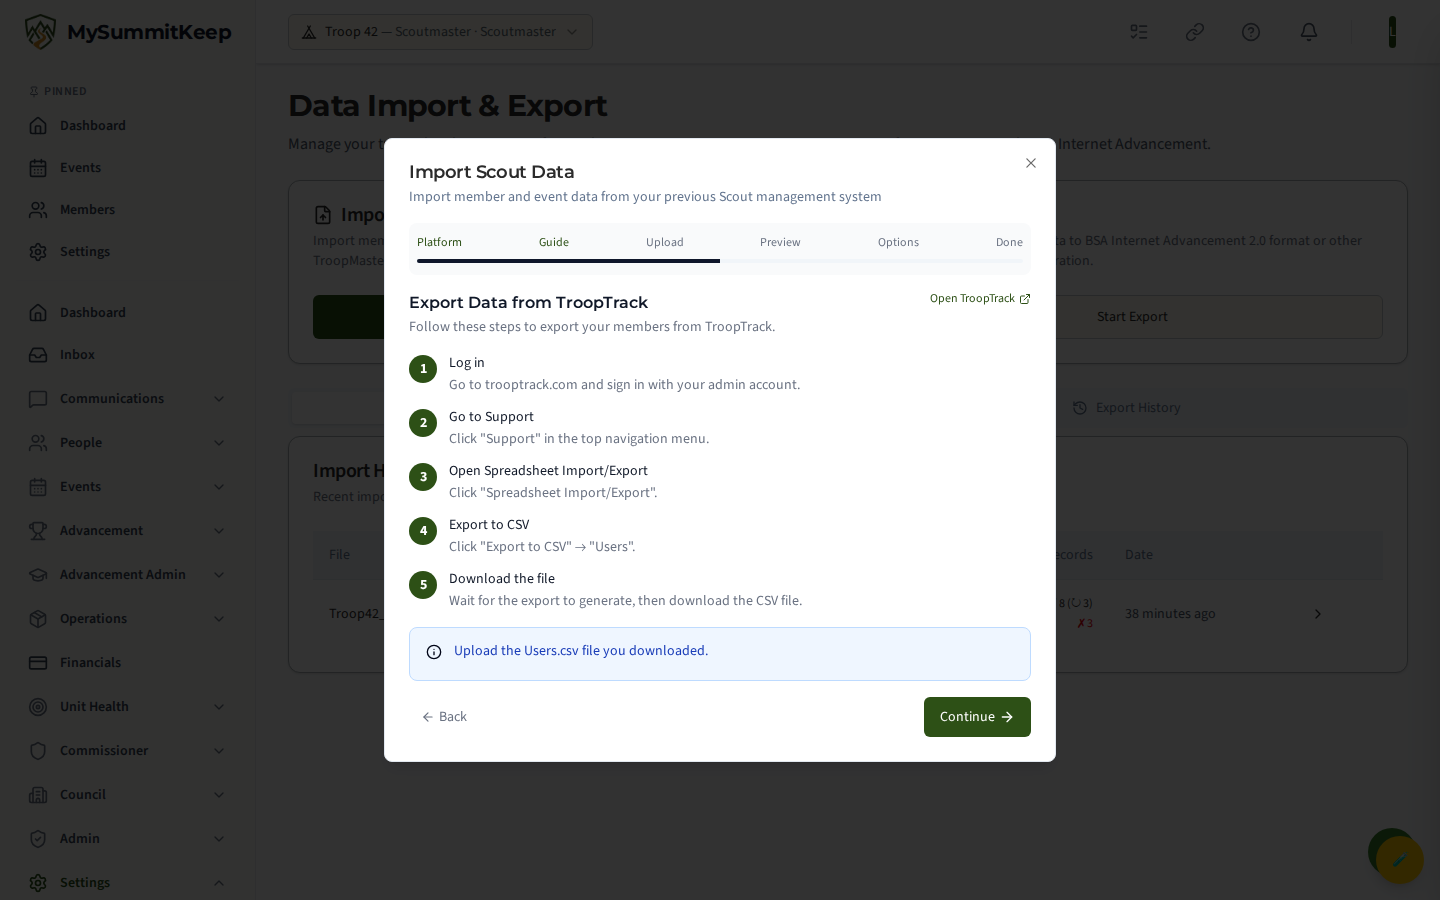
Section titled “3. Follow the export guide”The wizard then shows numbered, per-source instructions for getting the file out of your old system — which menu to click, which report to run, and what the resulting file is called. A blue note at the bottom tells you exactly which file to upload.
4. Upload, preview, and review warnings
Section titled “4. Upload, preview, and review warnings”Drop your exported file onto the upload area (Scoutbook lets you drop several files at once). The wizard parses it without writing anything yet and shows a preview with mapped columns. Rows with problems — a missing youth birthdate, a duplicate, a name it could not match — are flagged so you can fix or exclude them before committing.
5. Set options and commit
Section titled “5. Set options and commit”Confirm the import options — Merge with existing records and Skip duplicates are on by default — then commit. Only the rows you kept are sent. The wizard reports how many records were imported and how many were merged.
Import history and reconciliation
Section titled “Import history and reconciliation”Every import is saved. Open the Import History tab and click any job to reach its detail view at /import-export/:jobId.
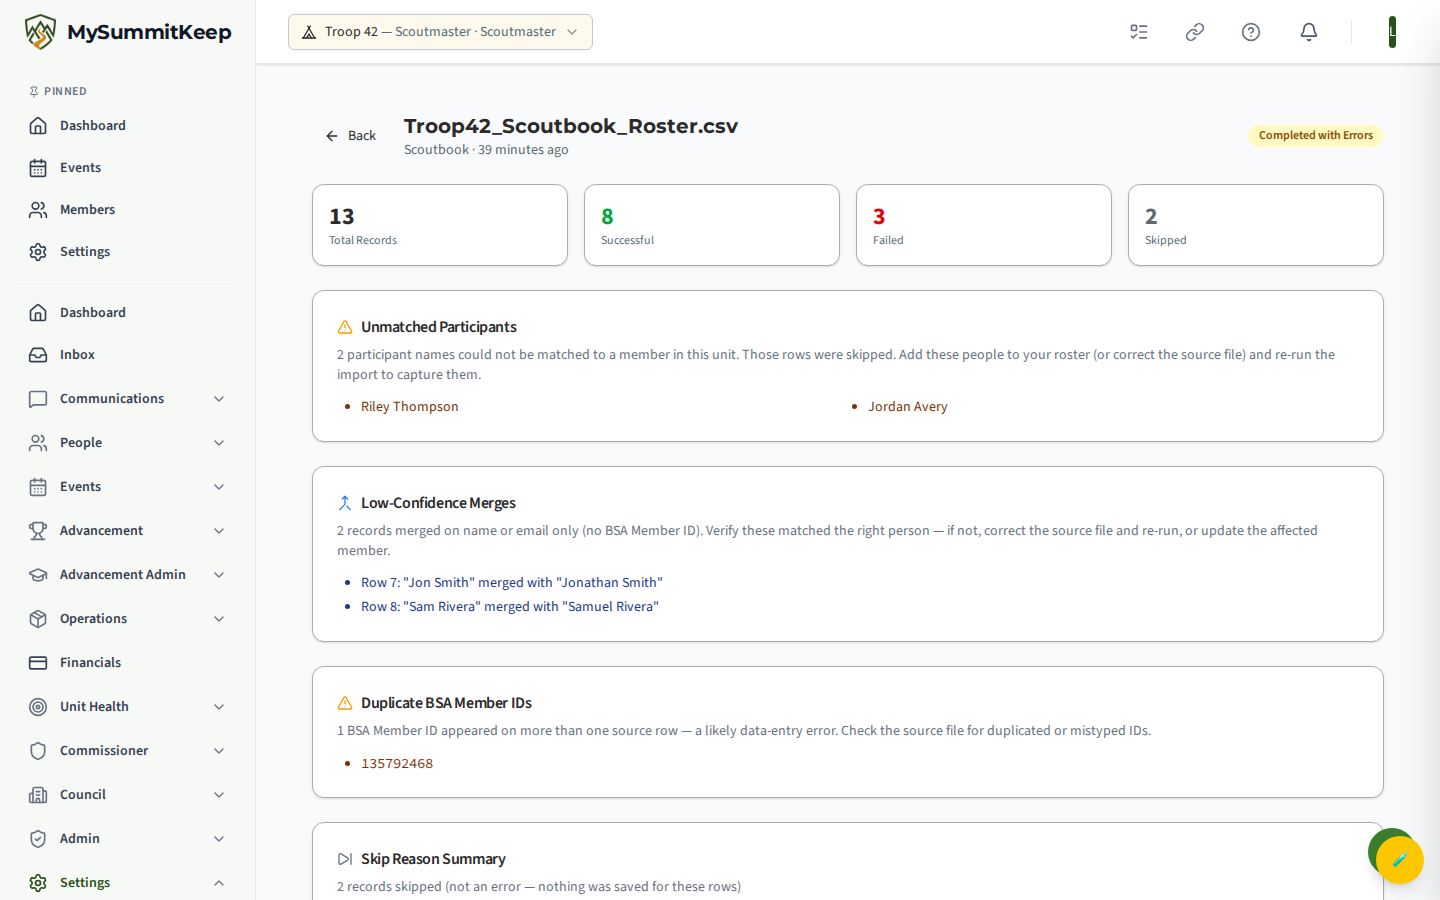
The detail page shows:
- Total / Successful / Failed / Skipped counts at a glance.
- An Error Summary and a Skip Reason Summary that group rows by cause, so a “no rows saved” result tells you whether it was duplicates or unmatched names.
- Unmatched Participants — names from an event or attendance file that did not match anyone on your roster. Add those people (or fix the source file) and re-run to capture them.
- An Import Records table you can filter to All, Failed, Success, or Skipped, with each row expandable to show its original data — the reconciliation workflow for tidying up after a large import.
Inviting imported members
Section titled “Inviting imported members”Imported people appear on your roster but cannot sign in yet — they have no account, so their identity is not bound to a real login. In the Members table they carry a No Account badge.
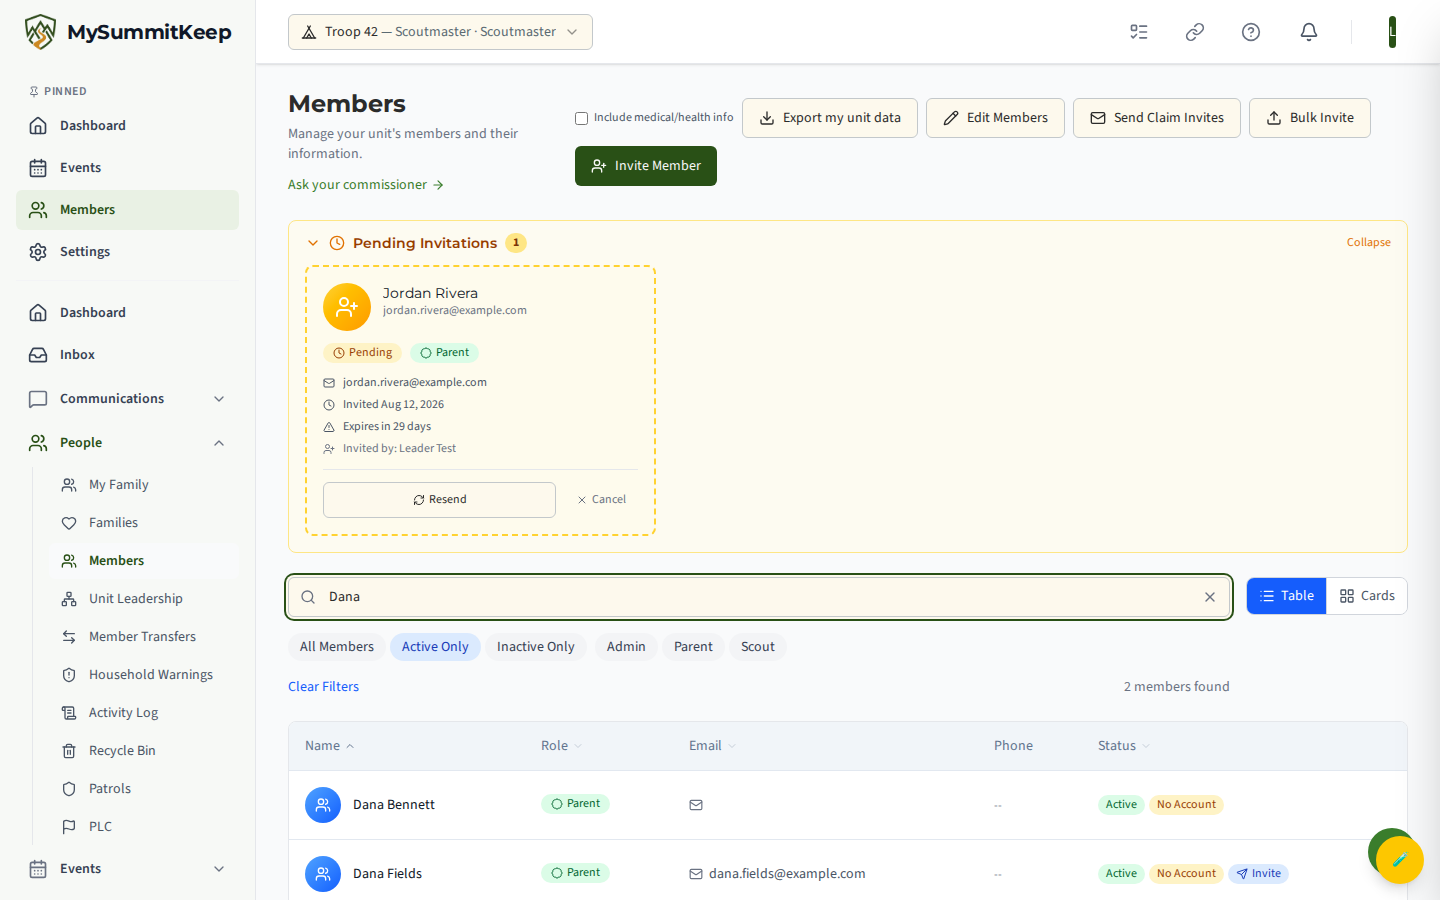
There are two ways an imported member gets a real account:
- You invite them. If the member has an email on file, an inline Invite button appears next to the No Account badge. Use Members → Bulk Invite to send many at once. The invitation email lets them register and binds their new login to the existing record.
- They sign up themselves. A parent or Scout creates an account, picks your unit, and the platform detects a matching imported record. The match does not link automatically — it queues for a unit admin to verify under Account Verifications. Once an admin approves the request, the new login is bound to the imported record.
If the same person was imported twice under different spellings, do not delete either by hand. Open the standalone Member Merge tool at /admin/member-merge, pick the record to keep, and merge the duplicate into it so no history is lost.
Exporting back to BSA
Section titled “Exporting back to BSA”The same hub exports your data out. Start Export produces a BSA Internet Advancement 2.0 file you can upload to advancements.scouting.org, and also supports Scoutbook Plus TXT, Generic CSV, JSON, PDF, and Excel for backups and integrations. Like imports, every export is recorded in the Export History tab.
Related: Roster & Members · Need help? We usually respond within one business day.